Showing posts with label Wedding Cake Story - complete. Show all posts

Thursday, October 13, 2011

And the REAL Wedding Cake was.....

SQUARE!!


Yep... the bakery didn't know the difference between a ROUND cake and a square one!! LOL!

Susi's written comment to me was... and I quote...

"Greg & I are grateful to you for BOTH our beautiful cakes! :)
(And the bakery is happy they didn't have to make train tracks out of fondant!) But square, really? What part of EXACT was soooo difficult.
AND btw, the florist (expecting a big ROUND cake) didn't have enough
of the ribbon...OOPS! She did a nice job compensating, though. They almost
had no ribbon, & then I was gonna cry. SERIOUSLY, PEOPLE, DON'T SCREW THIS UP!! :) And it was the florist to the rescue!"

Oh well, even though it's square, it was an honor to be the inspiration for it, and it was a beautiful cake anyway....

Here's the Cake Table at her Reception!


Cake and mini-cake!

If you have no idea what I'm talking about, you can quickly catch up by checking out these past few posts! Just be sure to FIRST scroll to the bottom of the page and read the posts backwards, up to the top, so they'll be in order!

Monday, October 10, 2011

Beautiful Bride!

Well.... I finally have some photos from Susi's wedding to share! She made a beautiful bride and Greg makes her very happy.


CONGRATULATIONS Susi and Greg!


Saturday, August 27, 2011

My Friend..... The Bride-To-Be!

It's not a very good quality photo, but isn't she lovely? She's the prettiest Grandma I know!


This is my friend, Susi, for whom I made the Wedding Cake Gift Card Box!

We've been friends a long, long time..... I look it! But she on the other hand hasn't
changed much in the 22 years I've known her. Her son was almost one when we met
and her daughter was not even a twinkle in her daddy's eye back then! My kids were
about 8yrs and 6yrs old at the time.... boy, time flies by!

Anyway.... I wanted to tell her what a wonderful  honor she has bestowed upon me!
The "cake" I made her arrived, and she liked it so much, that she is having her actual
wedding cake made like it! I was so shocked... I was moved to tears! Happy ones!
And I was so happy she loved the "wedding cake" I made for her and Greg. :)

She said she sent in a photo of it on Friday, so the bakery would know what to make!
And she also said she is going to have my gift at the reception so the guests will know
what inspired her own REAL cake!..... This just blows me away! I never expected
such an honor! She is such a sweetheart! Greg is a lucky man! I hope he knows it.

Thank you, Susi, for this great honor and for being my friend all these years!
I wish many happy ones for you and Greg in the future.


Thursday, August 25, 2011

Peanut Butter Balls - a Favorite Treat... Yum! Yum!


You can probably tell these are so "rich"! And oh so delicious! Yum! Yum!
These PB Balls are so addictive that my best friend made for me. She's so sweet and knew I needed an incentive to get a move on, and get Susi's wedding cake and card finished up. She knows me sooooo well..... this bribe worked! All is done.... Whew!


Going to Pick Up My Bribe....... Peanut Butter Balls here I come!

I'm going to pick up my promised peanut butter balls from Carol this afternoon! (and
to stay again for a visit, too!) I was suppose to pick them up on Monday... I did go then,
with the intention of bringing them home with me. But, after our nice long visit, we both
FORGOT them.... duh! How crazy is that? I got all the way home before I remembered!
Let's see if either of us remember them this time!

But, she doesn't have all 100 ready yet.... she has "almost" all of them ready.....
87 so far..... because she ran out of chocolate to cover them! So I'll have to make do
with the 87 for now, until she can get more chocolate.... will I survive? I wonder how
long it will take to go through 87 of them? Hmmm... let's see...

... Since I can only eat 2 at a time, at the most, because they are soooo rich, and even
with sharing some with the hubby..... and I can't have them everyday.... I'm pretty sure
that boils down to lasting at least a couple months :) ..... so I think she has some time
before I "need" the other 13 balls!!

I'll try to post a photo of them very soon!


Thursday, August 18, 2011

The Wedding Cake for Susi

I am finally done with the Wedding Cake Gift Card Box I made for my friend, Susi!
As you all probably know, this 'cake' was inspired by Tracey Mason's fabulous one with those rolled roses she is so good at making!

Well, try as I might, I could NOT make those roses. My hands cramped after trying just
3 times, and they still didn't even resemble anything close to a rose, lol!..... So, I had to come up with another plan. One that I could do!

I was inspired again... this time by 3 ladies - two CTMH consultants:
1) Connie MacFarlane (see post "Easy Paper Flowers" under 'Flowers' on this page)
2) Mandy Leahy (see post "Carnations" under the 'Flowers' on the same page)

and by Lorinda from Atwater Moon (see post "Itty Bitty Paper Flowers", also under
the 'Flowers' here ).


Now without further a do.... I give you Susi's Wedding Cake! ---- just click on each photo to see it larger!


(Update 10.27.13 - With a new post today, on my latest Wedding Cake Box, I had to revisit this post.... it just occurred to me that I took the photo above before I added the pearls to the top and bottom layers, LOL!)

I made this using Tracey's instructions: 3 nesting paper mache boxes, covered in Colonial White cardstock. The middle layer is embossed using a Sizzix embossing folder in my Cuttlebug! Then several coats of Pearl Paint. The red paper "ribbons" at the bottom of each layer, were added after painting (and before hot-glueing the layers upside-down on top of each other!), as the pearl paint turned the red to pink!

The red flowers and the yellow-orange flowers are not made with CTMH cardstock, because I did not want the white-cored paper for those flowers. So those cardstocks were just from my stash. The colonial white flowers, both carnations and itty bitty's, are inked on the edges in Cranberry - 4 times to get the edges dark enough!

Here are the side and back views:

the left side


right side and back


The next photo is a close-up of the top of the 'cake'. The top carnation is just pinned on with a floral pin and the gift card is down inside a pocket I created and put inside the center of the cake. I cut a slightly wide slit in the top and second layer of the cake to accommodate the gift card pocket. The ribbons under the flower are attached to the gift card. I punched a hole in it (missing the magnetic strip) to put the tie through. After removing the gift card, the flower can be re-attached by just replacing the floral  pin to complete the cake again!


I made the carnations (inspired by Mandy) in 3 different sizes. The large are made exactly as in her tutorial, with 8 layers of the 2" scalloped circle punch. The medium size are done with 7 layers, and just not "fluffed out" as much as the larger one.

For the smallest carnation I actually used part of a Martha Stewart All Over the Page Punch, but it's the equivalent of a 1-1/4" scalloped circle punch. They are made with just 6 layers!

I did try inking the edges first, before spraying with water, which made the ink gradiently bleed toward the center of the petals (cool look!), BUT doing that made the Cranberry ink turn to Sorbet!....  NO KIDDING!! So I had to wait for the flowers to completely dry before inking them!


The yellow-orange flowers (inspired by Connie) are actually a cardstock version of hers! These flowers needed the Liquid Glass to hold together!

I did not have any 12-petalled flowers to fold and use, so I punched out ten 6-petal daisies (yes, 10 for each flower!) - glued 2 together as a base, off-setting the petals, so they ended up with 12 petals! Then folded the other 8 layers like Connie does in her tutorial, put a puddle of Liquid Glass in the center of my base, and glued 7 of them down by putting the folded end toward the center. The eighth folded petal, I glued straight up in the middle!.... Had to hold these puppies together for a minute or two for the glue to set a bit before moving them to the side to dry overnight! Once dry, I separated the petals a little bit to get a fuller look.


The other small red and Cranberry-tipped Colonial White flowers, are the "itty bitty's" inspired by Lorinda, and made exactly like she says in her tutorial!

Here's a closer look at the cascade of flowers. I hope you can see more details in this one:


The leaves were all cut from Olive cardstock, dry embossed lines on the underside for 'veins', then lightly inked the edges and over the top to show the 'veins', with Olive ink.

I covered the hot-glue seam between layers with glitter to help hide the glue.
And the final touch was the Pearl Opaques to adorn the top and bottom layers!
Viola!.... my masterpiece!


I hope you really like this creation I made.... while many were the "trials and errors"
in this endeavor, since it was my first attempt, I feel that it came out beautifully in the
end, and I know Susi will love it!

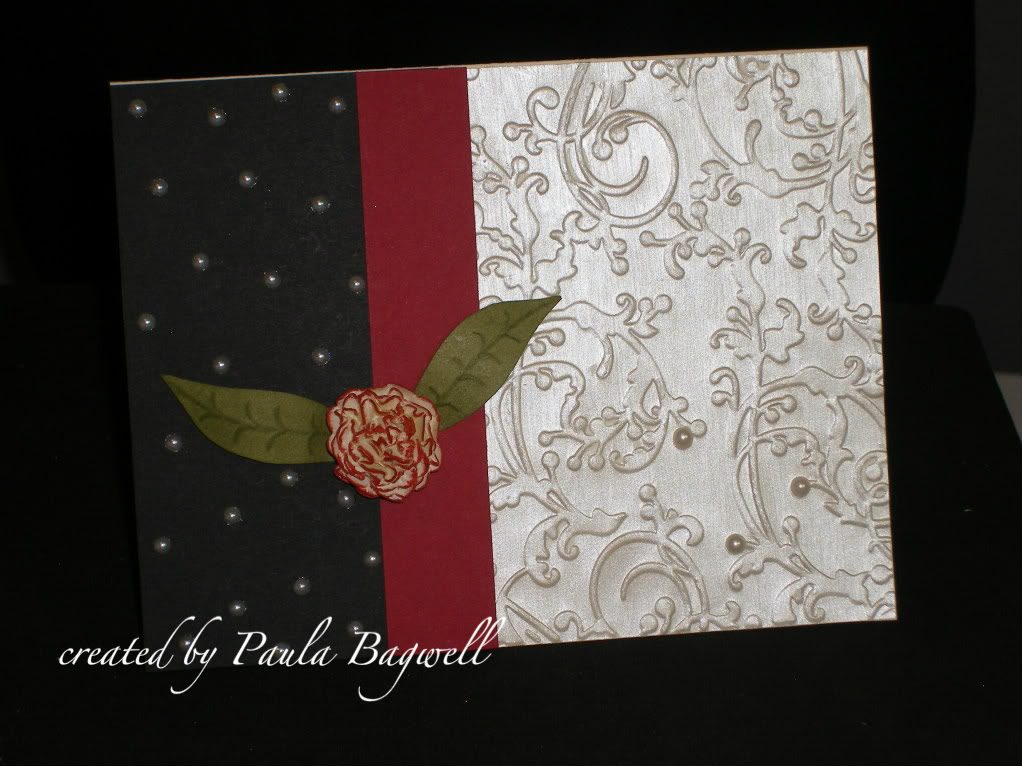
One last photo - the matching Wedding Card:


So, now that I'm done (and done early by 2 days from my given deadline!), Carol owes me the full 100 gloriously scrumpious peanut butter balls!!!... Get to rolling them Carol!

Hugs!


Saturday, August 13, 2011

HORRORS!!.... I can't believe it --- A Bribe!

As I said at the first of the month, I've been working on my own version of Tracey Mason's
wedding cake gift card box... just wanted to leave a brief update!

Well... I've finally finished the flowers and leaves (at least I "think" I have enough made
for the top and cascade!), but I have to attach them all to the cake. Also, I haven't even
started the matching card, so I still have a bit to go before I can post the results!

My BFF and CTMH consultant, Carol Nicholson, has challenged me to have it completed
by next weekend, and she is actually BRIBING me with a favorite treat of mine....
Peanut Butter Balls (they are covered in chocolate)!.... She has promised me 100 of these delightful little balls - packaged by 10 so I can easily freeze them and pull out a few at a time when needed. YEAH!  :) ..... but only IF I can get the cake finished by next Saturday!

And there is a downside to this (although Carol called it an "incentive"!).... She will deduct 25 PB Balls PER DAY that I'm late!!! Oh my! With everything else I have to do this week, including doctor and eye doctor appointments, I need to use every spare moment I have to get this done, just so I can ship it off to Susi in time, because the wedding is Sept 7! (and I'll also get the full 100 PB Balls! I do share them with my hubby.... he'll probably get one per package!)

Related Posts Plugin for WordPress, Blogger...