Showing posts with label Punched Art. Show all posts

Tuesday, August 8, 2017

Anniversary Hearts


(click on photos to view larger image)


I wanted a lot of hearts for this anniversary card, so I started with embossing  the white front panel with a tiny hearts embossing folder. Then I matted an extra piece and added it on top. 


I used a heart punch to make the patterned hearts from CTMH Bella paper (retired)... and added a little bling to each one.

Now you just get a peek of the inside here:


But here's what the inside looks like.... I repeated the matted strip piece and added overlaying hearts. The sentiment is from Papertrey Ink's One Big Happy set... the "happy" is from a die in the set and the "anniversary" is stamped.


Here's a closeup of the inside hearts:


I punched out 2 more hearts from white cardstock and layered them under the top heart to give it a little more dimension.

I really love how it turned out and it was very easy to do.


Sunday, October 27, 2013

Wedding Cake Box for an Anniversary!


Well, I can't believe it, but I made another one..... the 


Wedding Cake Gift Card Holder Box!!

Only this time it was for an Anniversary... for our son and DIL. You can click on the photos to see the larger image. I have the instructions for one of these in the blog post of my first cake box... you can find it here. So I'm not going to print out all the instructions again! I'll try to point out the different things I did on this one, and any new instructions needed. 

Front View

On this cake, I covered the layers with CTMH cardstock in Sunkiss Yellow, but I did not emboss any of the "cake" layers. I decided to apply the cardstock with strong double-sided tape, instead of the wet glue I used on the first cake. I ended up having to use wet glue to get the ends to stay put anyway, so I recommend using a wet glue for entirely covering the boxes, as it gave me a much better permanent bond. 

And this time I tinted the pearl paint with the CTMH Sunkiss Yellow reinker before painting the layers, to keep the color from turning a lighter yellow. 

Left Side

Also the white satin ribbon is the real deal here, not paper 'ribbons'! I had to put the ribbon on in two layers, as the yellow pearl paint bled through the first ribbon layer where I had applied the glue. (Oh no!) But the top ribbon layer covered those spots very nicely! Whew... avoided disaster!

I did not use glitter to cover the hot-glue seams between the layers like I had done before. This time I went over them with Liquid Pearls in White Opal.

Back View

Instead of the 'spikey' flowers on the first cake, I chose daisies, as this is her favorite flower, and what their real wedding cake had all over it. 

I made each daisy by punching 2 flower layers and then snipping a "v" shape from the end of each petal (very time consuming, lol). I slightly rotated the 2 layers to offset the petals just a little bit. The center of each is actually a button... yes, buttons.... BUT they are covered with a 2-tone mix of Flower Soft that I blended myself. I love how they turned out with their fuzzy centers! 

I chose to arrange them not only throughout the cascade, but around the middle cake layer. That's why no embossing was needed on the middle layer, like I did on the first cake. And I used the Bitty Pearls on the top and bottom layers.


Right Side

The carnations and 'itty-bitty' flowers are made just like before... just color changes, with darker inked edges.... Amethyst CS with Gypsy inked edges and Blush CS with Cotton Candy inked edges on the carnations, and the 'itty-bitty's' and small carnations are done in White Daisy CS with Sunkiss Yellow inked edges. Some of the carnations are plain white and some of the 'itty-bitty's' are also sprayed with Glitz Spritz in Sunset Pink before adding the Liquid Pearl centers.

The leaves are different...... instead of hand cutting and inking them, I just purchased these pretty 2-toned ones from I Am Roses. I think they match the overall cake very well. 


Top

The pearl hat pin is again holding the center flower on, and it with it's leaves, are covering the gift card and slot in the top of the box. The skinny yellow ribbon is attached to the gift card for easy removal and then the center flower can be replaced! 

I mounted the cake on white with punched border, then on gold mirricard, and finally the chipboard base to stabilize the whole project.

OK... I think I have covered it all.... so I hope y'all like this box as well as the first one!


Supplies:
CTMH: Cardstock - Amethyst, Blush, Sunkiss Yellow and White Daisy; Inks - Cotton Candy, Gypsy and Sunkiss Yellow; Reinker - Sunkiss Yellow; Pearl Paint; Bitty Pearls
Lindy's Stamp Gang: Glitz Spritz - Sunset Pink
I Am Roses: 2-toned leaves
Liquid Pearls - White Opal
Flower Soft and Flower Soft Glue
Marco's Paper: Mirricard
Other items: Assorted punches; foam brush; X-acto knife; paper mache nesting boxes; Scor-Tape; hot glue; glue dots; chipboard; pearl hat pin; white and yellow satin ribbons; buttons; brads


Sunday, September 1, 2013

Bridal Shower - WEDDING CAKE Gift Card Box

Wedding Cake Gift Card Box
made with paper!


Next weekend, our one and only nephew is getting married! Early in July,
his mom and I gave the happy couple a bridal shower/dinner at my house. We hand-crafted some paper decorations to hang above the hearth, where the gifts were, as well as over the bistro table, where the delicious cupcake tree sat! 


You can see the whole and half-circle rosettes hanging down. We had attached them to the light fixture that hangs over the bistro table.

Alongside the cupcakes, my sister placed her wedding cake gift card holder box! After seeing the one I had made my friend, Susi (see my original cake box here, along with the 'how to' instructions), she was just waiting until her only child got married to make one for them! 

Of course she used their color theme of red, white and black (in this case zebra and red!) If you click on the photo to make it larger, you'll see the "zebra" print center on the rosettes that I had to hand-draw! You'll also see the zebra cupcake holders around the outside of each cupcake!

Now here are some close-ups of her wedding cake gift card box.... so sorry, in advance that a couple are blurred.... 


front view

side view

top view

front view

The bride-to-be loved the wedding cake box! That's what mattered most :) .... hope you like it, too!


Thanks for stopping by.... come again :) 


Side Note: Something is apparently wrong with my camera, since ALL the photos looked perfectly clear on the screen, and it wasn't until I loaded them in to the computer that I found out how bad they were. I couldn't even salvage the 'front view' close-up while the cake box was on the bistro table. I'm glad my sis had taken a picture of it while still in the scraproom, or I wouldn't have had any clear ones! Of the 60 photos taken at the party, we only kept 23 and most of them have some blurring as well... so disappointed :(  


Tuesday, December 18, 2012

Punched Heart Flower

Cute flower made with punched hearts!

There are no words on this tutorial, so you don't even need your sound turned on. This flower is so easy, that the video images are all you need to follow this technique.


Watch on YouTube: HERE


Tuesday, August 7, 2012

Engaged!.... (long post with many pictures!)

Our son is getting married on September 8th! Last Tuesday eve, they surprised us with some engagement photos, and this is one of them:

(I added the text)


They had come up for a wedding of friends, the next day, and I had been working on the wedding card for them to take to the happy couple (another Floral Impressions Easel Card!) I wasn't done with making the 3D envelope box it had to go in, so Michelle got to see the card up close and personal! Now, she and her women folk are all "crafty" women (just not in scrapbooking or cardmaking.) 

So, I was very flattered at her attention to and comments about the card.... so much so, that I decided to make her an even more elaborate one... one with a different engagement photo that she mentioned was one of her favorites. I made it so they could use it as a photo decor item in their home (or just throw it out if they didn't like it, lol)

Michelle's sister and SIL gave her a bridal brunch for her shower on Saturday. With my health, I wasn't sure I'd make it since it's more than 2 hours away, but I did. YAY! It was a fun and happy event! There were over 30 women attending, and she received many nice gifts for their new home together.
I had my real gift shipped ahead just in case I didn't make it, so I ended up taking her the photo decor and a card, that turned into a kind of mini-album.

Here's the photo of the decor piece I made:


click to see photo larger

Michelle's wedding colors are pastels... a pink-azalea color, yellow and a touch of purple. Her favorite flowers are daisies, which will be her bouquet. Her bridesmaid's will be in the pink tones and the wedding cake will be chocolate with yellow icing and daisies flowing all over the top and sides, gradually thinning out as they get to the bottom layer. With all that in mind....


That's why I did the easel part of the project in yellow (some Basic Grey color I don't remember). I triple matted the photo, first on white cardstock embossed with an ivy pattern, then on a patterned paper from my stash that I thought complimented the pattern in her dress, and then on
Gold Mirricard from Marco's. The sentiment's I did in MS Word, and matted them on CTMH Cotton Candy cardstock.

There are 2 sizes of daisies on here.... the smaller ones, as well as the small pink roses, yellow cherry blossoms, and the leaves are from I Am Roses.
All the smaller flowers were white to start with, but I painted them with
Lindy's Stamp Gang's Starburst Spray in Cotton Candy Pink and I used their Yellow Rose of Texas Magical Micas... that's in their Prairie Wildflowers set.


The base is 7.25" x 12" and built on chipboard for extra sturdiness. The bottom patterned paper is of small yellow daisies on a white background and the whole paper had a golden shimmer to it. (You'll be able to see it better in the photo of the matching card.) The next layer is the Gold Mirricard again, and then topped with daisy patterned paper from my stash that is so old, I don't even remember the store I purchased it from, lol :)! But it's made from a real photo of a field of daisies, and it really made exactly the look I was going for! I love when that happens!

The 3 large daisies on the project I made myself! I'm so proud of these as they're my first attempt at daisies!.... I started each with 2 paper flowers from CTMH. I had to hand-cut all the niches in each petal of every layer, to get them to resemble the other daisies. I glued the 2 paper flowers together, with petals slightly off-set, making a daisy. In the center of each, I put a CTMH clear button, then covered each button with a custom two-color yellow flower soft to get the "fuzzy" look I wanted. I liked how they turned out so much, that I covered the centers of the I Am Roses daisies with the flower soft as well. I finished it off with some butterflies (punch from Martha Stewart) in CTMH Floral Impressions paper (retired), inked with CTMH Gypsy ink, to get the bit of purple added in, and topped them off with some bling swirls marking their "flight" pattern, and CTMH Bitty Sparkles for their bodies! 

I also made a matching 3D box to hold both this easel project and the card.
Since it had to be longer than 12", I covered the seam with the daisy paper.


And I knew way ahead of time, that I was going to make a card "booklet" (or mini album) for Michelle, because of the things I wanted to include in it. So, I matched the card to this elaborate easel decor piece I had made!


This is the card front with all I Am Roses embellishments. You can see the yellow daisy paper better here, but still not the gold shimmer it had... you had to hold it at an angle to see the shimmer! Same Basic Grey yellow cardstock as the easel, and all the inside 'pages' are CTMH Cotton Candy cardstock.

The inside pages are as follows:


This is a poem I wrote for Michelle to welcome her to our family!
(sorry the photo is a little blurry)

These pages are the "Recipes"!
Left one I wrote for a happy marriage and right one
to add to the recipe book she received!
It's a recipe for Chocolate Peanut Butter Oatmeal NO-Bake Cookies!

Just a crazy personal note to her!
And because I had the gift sent to her home,
the last paragraph tells her to turn the page
to see her gift that should arrive soon.
(but she got it the day before! Go figure!)


It's a PINK KitchenAid Mixer with a flexible edge attachment
(see the small photo on the left)

I made this photo collage on PicMonkey's free online photo editing site. The images are all from Google Images... top one says "Bridal Shower" on the umbrella, second one is gold wedding bands, 3rd is the flexible edge attachment, and the bottom one is the wedding cake Michelle wants (from Martha Stewart Weddings).

Can you tell her favorite color is pink?

Well this post is finally done!... I told you it was long and had lots of pictures in the title, so if you made it all the way down here, thank you so much for taking your precious time to check out my blog post! :)

Have a GREAT day!


Friday, July 27, 2012

Last Floral Impressions Twisted-Easel Anniversary Card

Well... here is the last of this year's anniversary easel cards! Another "twisted" one! I'm finally done with the Floral Impressions paper pack... yeah!


I don't have anymore anniversary cards to do for this year
(my fiscal Oct-Sept!)

Now I can concentrate on making 2 wedding cards... one I need for next Wednesday... yikes!... and the other for our son's wedding on Sept 8th! Better get myself in gear, and get a move on! My hospital stay put me behind a bit!

Then it will be back to anniversary cards in October with a "new" paper pack and card design... wonder what I'll decide to do? But I'll have to put those decisions off until after the wedding!

Just a side note... with all this wedding stuff going on, and my recuperation, and our first grandchild due in three weeks, and life in general, etc, etc....
I probably won't be able to do many blog posts, if any at all... but I'll do my best to get back asap to my 10 "posts" per month schedule I had decided
to do!

Wednesday, July 25, 2012

Sympathy Card

Some sad news for today...

My sister's best friend, Kathy, lost her battle with cancer on July 13th.
They were friends for 40 years!

I actually introduced them back in 1972! We were teenagers then, and had just moved to Dallas at the time. There were lots of kids living in the apartments we moved into, and I had met Kathy's younger sister first. Anyway.... I was in the hospital when she died, so I have just now finished the sympathy card for my dear sister.


I have been making anniversary cards with the retired CTMH paper set
Floral Impressions, and it seemed perfect for the sympathy card as well, since Kathy's favorite color was purple. I also decided to make it a
twisted-easel card. I hope my sister likes it, even though it's very late.
She was up at the hospital with me every day, despite her personal grief.... so I know she'll understand why it's late.


It's just so sad to lose a loved one.
Thanks for letting me share this with you all.


Sunday, June 24, 2012

More Anniversary Easel Cards

Here's a few more of my Floral Impressions Anniversary Easel and
Twisted-Easel Cards that I'm making this year:

Grey Flannel base with the old Level 1 Kit matted on mirricard


Mirricard mats on Amethyst base


Level 1 Kit matted on Amethyst then put on Grey Flannel base

Mirricard mats on Olive base and ribbon inked in Gypsy


Floral Impressions is a retired CTMH paper pack, that coordinates with the CTMH colors of Amethyst, Olive, and Gray Flannel cardstock. Shiny mirricard is also used as mats on most of the cards. I used Magical Micas from Lindy's Stamp Gang to paint the flowers as always!

For more info on these, please see my other easel card posts both here
and here.


Wednesday, May 30, 2012

Anniversary Twisted-Easel Cards

Well, a little over a week ago, I promised to post some of my
Twisted-Easel Anniversary Cards. (To see the post with the regular easel anniversary cards, click here.)

Since we're still in my fiscal year according to anniversary cards
(Oct2011-Sept2012), lol, these cards are still 6x6 and done in
CTMH paper Floral Impressions (retired).


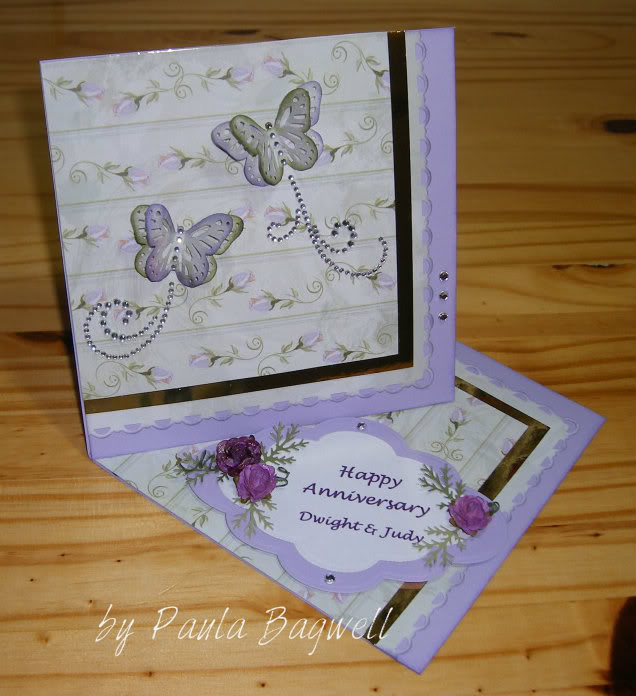
Amethyst base with GOLD mirricard, double-layer butterflies
inked in Gypsy on Olve and reversed to Olive on Gypsy

Olive base with GOLD mirricard and the same butterflies,
a different patterened paper from same set

This one is 'twisted' in the opposite direction.
This is the closeup of the top portion
and this is the closeup of the sentiment --- you can see the shadow
from the loops of the paper lace down on the sentiment...
the flash caused the mirricard to shine down, but not through the paper!
(all flowers are from I Am Roses and painted with
and the final card for today!

So that's it for now.... as you can see I made 3 of the 4 very similiar, with just a few differences like the placement of the bling, etc.

Sunday, May 20, 2012

Anniversary Easel Cards

If you don't know it already, I'm a little OCD! I can't seem to change the type of anniversary cards that I make except on a yearly basis! And "my" year doesn't start in January either! It starts in October.

Why, you ask? Because that is when my BFF's anniversary is (and my sister's was, as well, but not anymore), so I start with them! So then everybody else I know, gets a card with something of the same theme...
like last year - Oct2010 to Sept2011 - everybody got cards made with the CTMH Miracle paper (retired), but I didn't take any photos of them. :(

This year (Oct2011 thru this coming Sept) I started by making both of them Double-Twisted Easel Cards. If you'd like to see those cards, check them out here and here.  

So this year, everybody is getting an easel card whether it's a regular easel, a twisted-easel, or a double easel. And all, except those first 2 double-easel cards, will be 6x6 and done with CTMH Floral Impressions paper (retired)! I've posted a few of them below:

grey flannel base and olive mat with double amethyst layered butterflies

olive base with gold mirricard mats and double-layered butterflies

This next one has the same olive and gold,
and the butterflies are still 2 layers but inked with olive
on gypsy and the other as gypsy on olive!


These 3 are the same - olive base with gold mirricard with
the opposite inked 2 layer butterflies. The center
card just has a different greeting shape and configuration.

I also decided to do a wedding card as 5x7 easel:
This one has amethyst as the base and silver mirricard mats.


This final one here is done on an amethyst base as well,
but has purple mirricard mats!


I'm loving this Mirricard! If you click on the photos to see them bigger, you can see how really "mirror-like" it is by the reflections you can see.
It is so pretty!

The flowers are painted with Lindy's Stamp Gang Magical Micas, just like the posts of the double-twisted easel cards I mentioned above.

I'll post some 6x6 twisted-easels soon, so come back and check them out!
Thanks for stopping by today! I'm glad you came :)


Monday, April 30, 2012

Baby Shower Banner

(click photo for close-up view)

While my daughter came home for a short weekend visit, we gave her a "family only" baby shower. I'll be throwing her an "online" baby shower in a few weeks (which should prove quite interesting!). Why online? I'll tell you!....

She can't have a "normal" shower with all her friends and family in attendance, because:
1) She lives in one state and ALL her family live 1000 miles and several states away!
2) She's only been in her locale for a few months (moving there from the West, more
     than half-way across the country) and she does not work in an office setting with a
     bunch of gals around..... just one woman, the rest men.... so I can't rely on them to
     give her a shower!
3) She went to college near the East coast (still half-way across the country from home,
     just in a different direction!)
4) ALL her college friends were from all over the country and overseas!
5) And while she was in college, we moved to a different city than where she went to
     jr. high and high school!

So, I think it's pretty obvious by now and ya'll have realized, that it's impossible to have a "normal" shower when everybody lives all over the place! Hence, the small "family" shower when she was home for the last time before the baby comes and an "online"
one for everybody else!

Now.... back to our little shower at home..... it was a surprise, as you can probably tell from the banner, and she really had no clue! Her dad dragged her off to Sam's Club, while I, Carol and Tom desperately hurried to get all the pink balloons up (it's a girl!).
Her brother lives about 90 miles from us, so he came up and drove me crazy for the last half hour before the party started! He just loves to irritate pick on me! And her aunt had
to come straight from work!

Even though we had major problems with getting the balloons to stay in place, we were ready on time. Everything went as planned, EXCEPT.....

Nobody could yell "surprise"!!! (Side note: our garage is attached to the house via entrance into the laundry room. Then there is a short hallway that goes from the laundry room straight into the Master Bed/Bath, but to get there, you must walk by the entry door into the living room that's off that hallway to the right. We had hung a bunch of the pink balloons in that doorway to the living area.) The ONLY thing we did not plan for, was the fact that while they were gone, she drank 64oz of fluid and by the time they got home, she desperately needed the bathroom since the baby was standing on her bladder! 
Of course she saw the pink balloons on her way by the doorway, stopped long enough
to hold her finger up and say "one second" before dashing on, and... we all were just dumbstruck! Literally.... time went by and we just sat there looking at each other!
I'm sure it was only for a few seconds, but it seemed to go on forever! Finally someone broke the silence and asked "are we still supposed to yell surprise?"

Well, when she returned, I had to make her pose for her "surprised look" photos!

So fake! But cute expressions anyway!


Then after all the greetings, we had dinner, cake & punch, and the unwrapping of gifts! So all turned out good in the long run. :)

Now, a little more about the banner.... here's some close-up shots of some of the individual pennants:


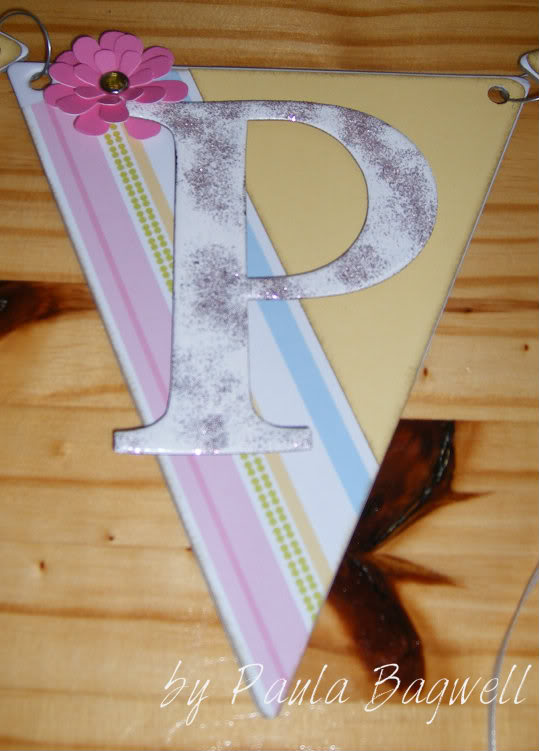
I absolutely LOVE how this turned out! It was my very first banner. I used a really old paper pack from CTMH called Flower Power with Buttercup cardstock, and covered the CTMH My Creations Banner. The pennants are each 6" across the top and 7" tall. I'll list supplies at the end of the post.

I used 4" chipboard letters I had custom ordered from an Etsy shop. First I triple embossed them with clear thick EP and then twice with White Daisy. Before applying the final coat of White Daisy, I sprinkled pink glitter on them and embossed the glitter right into the WD layer. On the "baby" word chipboard, I covered it more completely with the pink glitter before embossing.

I also used a variety of floral embellishments, making my own fancy-punched accordian rosettes with the Flower Power paper (inspired by Bev - SEE accordian rosette picture link in left sidebar to her blog). The embroidered flower on the "R", I dyed with Cotton Candy Reinker (it was originally white). All the letters are popped up with dimensional tape, and I also distressed the edges of all the papers with Desert Sand ink.

Well, I think that's all except the
Supply List:

CTMH Products:
    My Creations Banner
    Flower Power paper pack (retired)
    Buttercup cardstock
    Desert Sand ink pad
    White Daisy Embossing Powder
    Cotton Candy reinker
Custom 4" Chipboard Letters from Glitter Dust Designs on Etsy
I Am Roses Embroidered Flower
Martha Stewart Lace Border Punch
Clearsnap Cotton Candy Glitter
Basic Grey Lily Kate Ribbon
Scor Tape
Glue Dots
Dimensional foam tape
Ultra-thick clear embossing powder
Embossing Gun
Miscellaneous buttons, flowers, brads, embroidery floss, and "baby" word chip from stash


Related Posts Plugin for WordPress, Blogger...