Showing posts with label Tutorials - Cards. Show all posts

Sunday, May 26, 2013

Cami's Tri-Fold Card

Beate from SCS does another short video on how to make a 
Cami's Tri-Fold card.... (she'll tell you how it got it's name in the video). 

Watch the YouTube video: Cami's Tri-Fold Card.


This is the cute card Beate made in the video... 
I hope you like it, too.


In the short video, Beate just explains the basic information on how to make the card base, so she covers only what is relevant to the project. The items she uses to decorate with are all pre-made to save time. Of course you can decorate yours however you like! :) 


Wednesday, May 22, 2013

Magic Slider Card

I just love Christina Griffiths' video tutorials! The videos are very informative and well made. Her instructions are very easy to follow, too. You can find her website using this link... Card-Making-Magic.com. 

She makes some awfully beautiful cards and shares her tutorial videos with all the details, as well as other helpful tutorials like how to color images and how to get the most from your Spellbinder dies. I use many of these video tutorials in my blog posts so I can easily find them again! 

I ran across this video she'd made more than a year ago, on how to make a Magic Slider Card:


Watch on YouTube: HERE


.... This is such a fun card! Now this card may not be new to some of you, but it was new to me! And I am just amazed at what Christina comes up with. I truly would think of her as the Queen of Cards!


I hope you are as inspired as I was while watching :) 


Saturday, May 18, 2013

Telescoping Card

Create an expanding card with three or more layered cardstock shapes - circles, squares, spellbinder labels, even animal body part shapes! 

Beate from SCS shows how to do this in a very short video. 
Watch the video on YouTube by clicking HERE.

A telescoping card looks like the following sample:


This is the card closed:


This is what it looks like open:


This beauty was created by Leonie Schroder,
and you can find her blog here.


Saturday, April 27, 2013

Dome Cards

In the following video tutorial, Christina shows how to make beautiful and fancy Dome Cards using Spellbinders Oval Dies. 


Watch on YouTube: HERE


Now while she repurposed a plastic cover from a chocolate egg, thus rescuing it from ending up in a landfill, you can get these domes in craft stores as well. And I've even seen them at Flower Soft US (United States) online.... here. ... Or Flower Soft UK (United Kingdom) online.... here. 


Wednesday, December 26, 2012

Faux Layer Masked Card

SU consultant, Tami White, has this quick video on how to create a "faux layer" by using a masking technique. You can get the same look by using any brand of nesting dies, as long as they're large enough.

Watch this technique and see her pretty finished Faux-Layer Card:

Watch on YouTube: HERE


Friday, December 21, 2012

Twisted Circle Easel Card

Here's is quick tutorial on how to make a Twisted Circle Easel Card. I think you'll agree that they are pretty easy to do :)


Watch on YouTube: HERE


Sunday, December 9, 2012

Easy Window Card without using Cutting Dies!

SU consultant, Dawn Griffith, shows us a very easy way to make window cards without having to use any cutting dies. Watch the video below to see how easy this is:


Watch on YouTube: HERE


Monday, November 5, 2012

Get More From Your Spellbinders

Back on July 17, 2012, I posted a video from Christina called "Starting Your Spellbinder Collection". It showed what would be a good starter set of Spellbinders to purchase. The starter set would allow you to spend your money wisely and still make a variety of beautiful cards! If you missed it, you can check it out here.

Now in the next video, Christina shows how to get even more from your starter set. (You don't have to have the Spellbinders die-cut machine
or even get the big size of metal embossing sheet that she uses. These suggestions can be adapted to your machine and metal dies of choice.)


Watch on YouTube: HERE


I use the Spellbinders dies in my Cuttlebug! You just need the extra "C" plate for those skinny metal dies. So, the 'sandwich' layers are different when running it through the machine, but the results are the same! Remember though, the Cuttlebug can only take dies, embossing folders, etc. up to 6 inches wide. So I just watch what I purchase, so I know it will fit. You can purchase all the longer cutting/embossing plates you'll need for the longer dies (an A, B 2-pc set, and C plates). That's what I did! :)

Tuesday, July 17, 2012

Card Ideas using a "Starter" Spellbinders Set

There are so many beautiful Spellbinder dies to choose from, that it's sometimes hard to know where to start!  So making an informed decision before you shop, and spend all your hard earned cash, would be quite helpful and possibly money-saving!

In this video, Christina from Card Making Magic, shows a really good starter set that will cover most of the things you want to do, from textured backgrounds to beautiful flowers. Then she demonstrates some different ways in which to use the dies to make some lovely cards. Such inspiration!..... see for yourself:

Watch on YouTube: HERE


Wasn't that great? I just love all of her ideas. She is so creative and thinks of things that NEVER cross my 'logical' mind...... I wish I had a "creative" one, LOL :)


*** UPDATE ---- See the sequel video to this - "Get More From Your Spellbinders," - coming to this blog, being posted on Novenber 5, 2012 ***


Sunday, July 8, 2012

Pennant Cards

Christina from Card Making Magic, shows how to make some really pretty pennant cards in this video tutorial (NO dies are needed!):


Watch on YouTube: HERE


Friday, June 22, 2012

Suspension Card

Create a fun, interactive element for your cards by adding a suspending element! Beate from SCS shows an easy way to do just that:


Watch on YouTube: HERE


Tuesday, June 19, 2012

Double-Dutch Fold Card

Create a unique card fold with just a few score lines. Beate from SCS shows the finished card in Christmas papers, but of course, you decorate it in whatever paper is to your liking!


Watch on YouTube: HERE


So quick and cute!


Friday, June 15, 2012

Book-Easel Card

I saw a gorgeous easel card on Pinterest recently, and I got permission from the designer to post it on my blog!

This is a book-easel card by a talented lady from Australia... Valita Reynolds. Visit her blog at Valita's Designs & Fresh Folds.


Isn't it wonderful?!!! She used the Spellbinders Nestibilties Labels 7 die to make this card. ... AND she made a video tutorial on how to make it!
You can watch it: HERE


The finished card on the video is stunning, too!.... see?
(see Valita's post here)


Valita is such a talented lady, that after seeing this card and looking around her blog for a bit, I signed up as a follower of her blog, subscribed to her YouTube channel, and followed some of her boards on Pinterest! (am I now a stalker? lol) Bet'cha if you take a look, you'll be hooked.... and do the same! :)


Tuesday, June 12, 2012

Acetate Front Card

Another beautiful card idea from Christina of Card Making Magic....

......... an Acetate Front Card.

This provides not only a different look, but serves as protection for all those pretty embellishments you've slaved over, getting them just perfectly arranged on the front of the card!


Watch on YouTube: HERE


Sunday, May 13, 2012

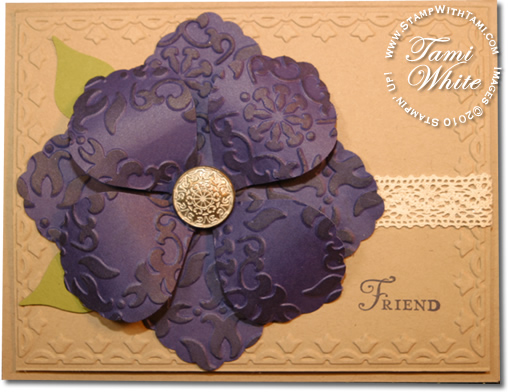
Blossom Petal Card by Tami White


I saw this card on YouTube and thought it was so pretty. SU consultant
Tami White made this with their Blossom Petals Punch:


Below is Tami's video tutorial on how to make this card. It's really very simple and can probably be done using a variety of different ways to
make the petals:

Watch on YouTube: HERE


Thursday, May 10, 2012

Water Card

This is a water card USING REAL WATER!!! (and it doesn't leak!)

Noreen, from Katy Sue Designs, shows how to make this adorable bath-time Mabel Attwell Water Card using products from Flower Soft.(at Katy Sue's) 

So click on the link below to watch this "cool" - pun intended -card demonstration! :)


Watch on YouTube: HERE


Friday, April 27, 2012

Baby Stroller Card

This card is just too cute! :)  It's a standing baby buggy carriage.... Adorable!
I made this for my daughter's surprise baby shower we had this past Saturday, while she was home for a visit.

I used this retired CTMH paper pack called More-to-Adore. Since the bumper pad for the crib is Pink Paisley Splash, I wanted to match the paisley theme, and this paper set was perfect! The card actually matches 3 nesting "hat" boxes I made for her. I will show you those in the next few days!

view laying flat

view standing up!

I got this card idea from Rhea, aka the night owl stamper. She shows how to make these in her 'take 2' attempt of her first video tutorial:   


Watch on YouTube: HERE


Aren't they precious? Hope you enjoyed it!

Supplies:
CTMH: More to Adore paper pack (retired), Cotton Candy Cardstock, Bitty Sparkles
Martha Stewart Lace Border Punch
Nestabilities Scalloped Circle Die
Adhesive: Dotto and Glue Dots
glitter flower brads (for spokes) and bow were old stash on hand


Saturday, April 21, 2012

Gatefold Card

Christina shows the basics of making a Gatefold Card in this latest video I found. She uses Spellbinder dies and emboss plates to embellish her card, but you can use anything you like.

I love how she puts one flower on the strip that hold the card closed, so that when slipped on into place, it looks like a flower cluster with the other flowers she used to decorate the front of the card. Very pretty indeed!


Watch on YouTube: HERE


Sunday, April 15, 2012

Pleated Center with Spellbinders

This takes accordian rosettes to a whole new level!!!

Christina, from Card Making Magic is at it again! For an unusual effect, make the beautiful center to a card with your favorite paper rosette and make the frame with Spellbinders! Awesome!


Watch on YouTube: HERE


Thursday, April 12, 2012

Free-Standing Card... Made Flatter for Mailing!

Christina, from Card Making Magic, shows how to make a card suitable for mailing... without needing a box! She gets rid of the flowers she's known for using (which are way too dimensional in height for the mail). But she still makes a dimensional one, just flatter, and she doesn't lose any of her creative style.

As a double bonus, the card she makes is a free-standing one! Hers is quite large... ...8x8... but you could adapt the measurements and make a smaller one or even a rectangular one (A2 size)! Remember, to add extra postage per ounce
(20 cents in USA) if it's heavier than 1 ounce, and for it to go First Class Mail, it must be within these guidelines:

DimensionMinimumMaximum
Height3-1/2 inches6-1/8 inches
Length5 inches11-1/2 inches
Thickness0.007 inch1/4 inch


Watch on YouTube: HERE


(I always put a very thin piece of bubble wrap over the "humps"... like the knot
in the bow or pearls or bling, to prevent P.O. machines from ripping
the envelopes and possibly the card!)


Related Posts Plugin for WordPress, Blogger...