Showing posts with label Spellbinders. Show all posts

Tuesday, May 14, 2013

Spellbinder Rolled Blossoms


Christina, from Card Making Magic, really gets her money’s worth out of the Spellbinder’s Spiral Blossom dies! She makes 10 distinct-looking flowers, including a bud, from just 3 sets of dies!

If that weren’t enough, they look even more different with all the different centers she chooses, including stamen, pearls, and even the bud for a fuller rose.

She also demonstrates what to do with the cut spirals just prior to rolling them, to get the petals started in taking on their shape!

This video is a great tutorial with loads of ideas…. I’m glad I found it!


Watch on YouTube: HERE


Saturday, March 30, 2013

Tip: Make Longer Borders from Short Dies

Here's a super easy tip to lengthen a die image to use as borders on cards, scrapbook pages, etc. This video is from Dawn Olchefske:


Watch on YouTube: HERE


You just need to adjust the measurements of the your paper of choice, so your piece will be as wide and as long as you need!


Tuesday, November 13, 2012

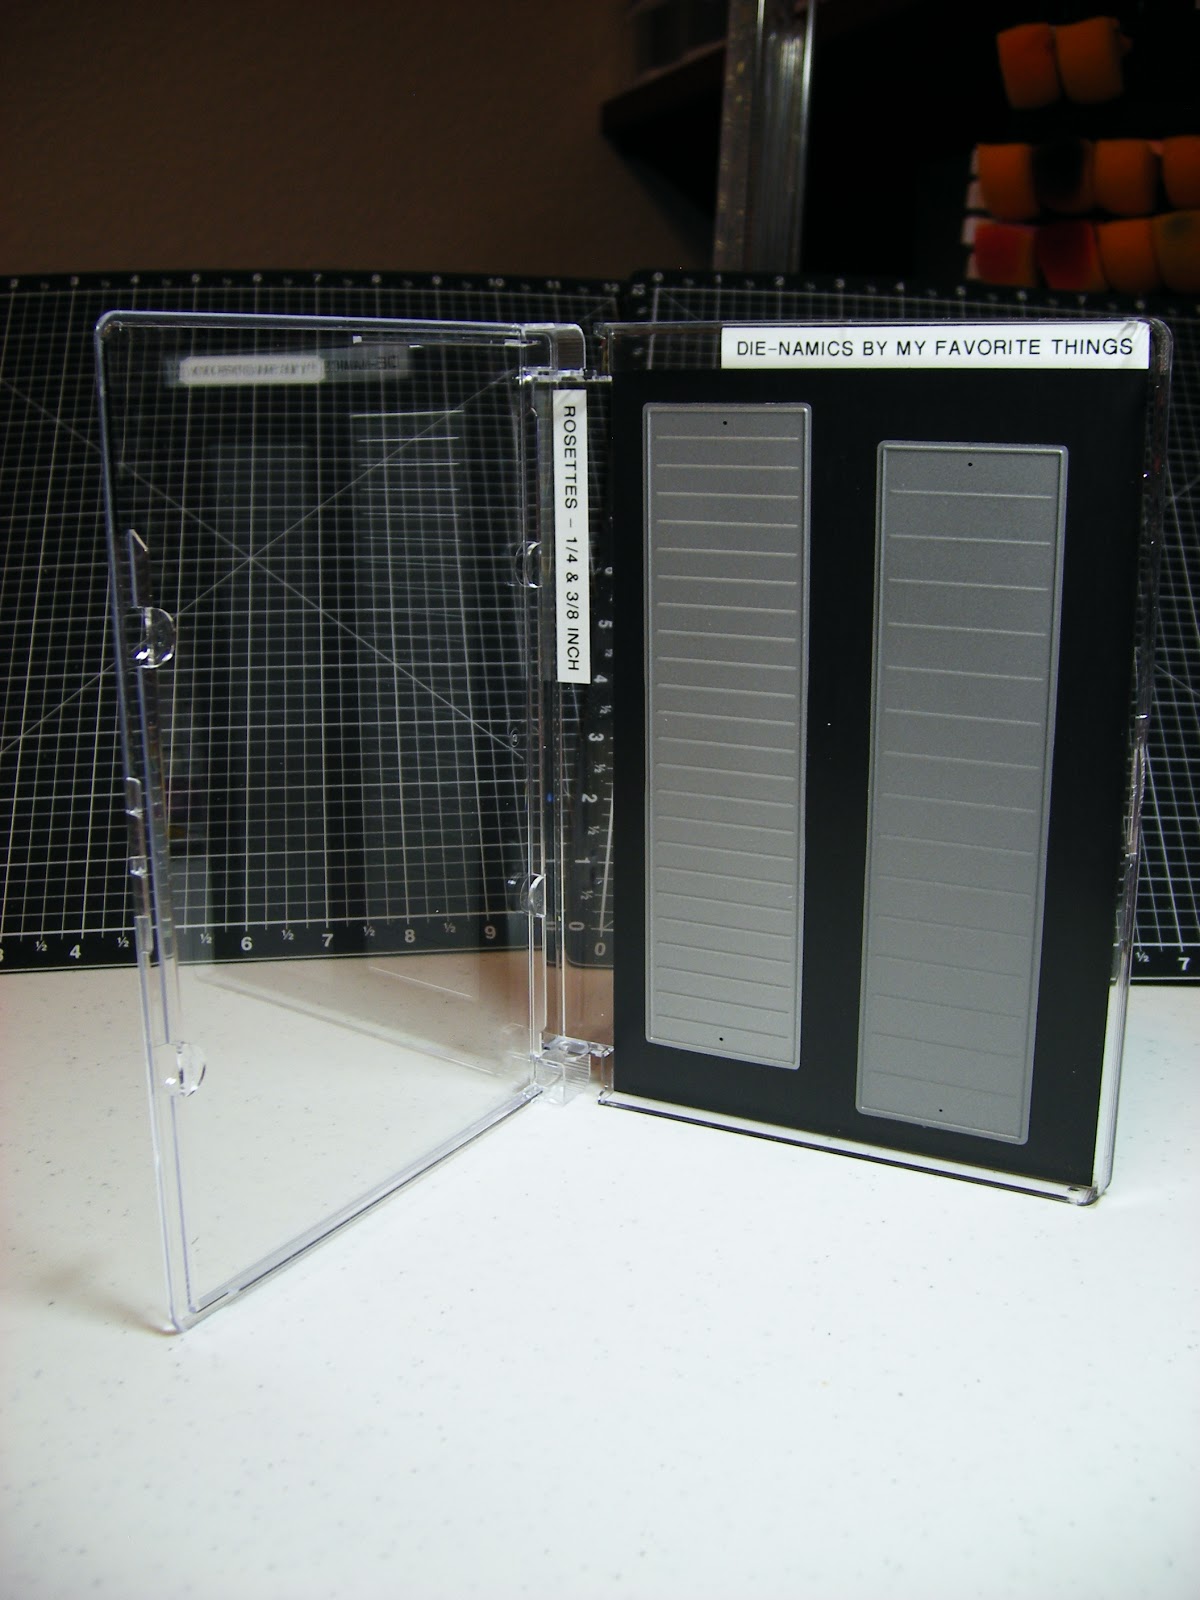
Storage for Spellbinders and ALL Thin Metal Dies!

I am so excited to finally have found a solution to storing all my metal dies!!!

You know what jewel cases are, right? They're the hard plastic cases that hold CD's and they have what I call a "nubbin button" inside that fits in the center hole of the CD to hold it in place. Well, in case you don't already know, that "nubbin button" insert is removable, but it's a pain to do and if you're not extremely careful, you can break at least several fingernails! (you can guess how I know this, lol)

Well, there is a company online that sells King Size Jewel Cases without that insert in them... YAY! The cases are bigger than a normal CD one, about the height of a DVD case. I found out about these from Amazing Paper Grace - Becca Feeken's Blog. The company now also has pre-cut adhesive-backed magnet sheets that fit perfectly inside!

I must say that these are just wonderful... take a look:

Spellbinder Nestabilities

The links to these cases and magnet inserts are:

Cases: click here

Magnets: click here

When you attach the magnets to the inside of the cases, make sure they are in position correctly BEFORE you stick them down.... that adhesive is very strong, and where you put them is where they'll stay.... ain't no moving 'em... just sayin' :) !!!
The magnets hold the metal dies in position so well, and work with all the different thin metal die brands that I have! As you can see, I photographed these all standing up, and I even held them upside-down and shook them, but the dies stayed in place!

These next 3 photos are all still Spellbinders, but just the different 'lines' they carry.
Spellbinder Labels Twenty

the NEW Spellbinders  Majestic Elements

Spellbinder Shapeabilities


Here are some of the other metal die brands:

Poppystamp/Memory Box Dies

Memory Box Dies

My Favorite Things (MFT) Die-Namics

Cheery Lynn Dies (in a regular size CD case)


The magnet sheets cut easily, and since I had several regular size CD cases on hand, I purchased extra magnets and cut them to fit. You can see a few finished cases in this next photo:


Regular Size CD cases


AND.... these King Size cases can also hold cling-mount rubber stamps. I have a few of those as well, so I just ordered some of the cases for them and used them without the magnet inserts!

Cling-Mount Rubber Stamps


I know these cases can take up a little space, but since I already had an old CD/DVD bookshelf with adjustable shelves in my scrapbook room (that my sweet hubby had repainted to match my room), I was able to rearrange a little bit and clear off 3 of the shelves to accommodate my new storage cases. Each shelf can hold 23 of either size, regular or these King Size! I don't have anymore of the regular cases... I used all 23 I had... and I've already placed a second order for more of these King Size cases and magnet sheets!

I'll have 8 spare cases left when I'm done, so I guess that means I can only get 8 more sets of metal dies, right?.... Who am I kidding?.... I'll be clearing off another shelf on the CD/DVD bookshelf before too long, lol :)


Monday, November 5, 2012

Get More From Your Spellbinders

Back on July 17, 2012, I posted a video from Christina called "Starting Your Spellbinder Collection". It showed what would be a good starter set of Spellbinders to purchase. The starter set would allow you to spend your money wisely and still make a variety of beautiful cards! If you missed it, you can check it out here.

Now in the next video, Christina shows how to get even more from your starter set. (You don't have to have the Spellbinders die-cut machine
or even get the big size of metal embossing sheet that she uses. These suggestions can be adapted to your machine and metal dies of choice.)


Watch on YouTube: HERE


I use the Spellbinders dies in my Cuttlebug! You just need the extra "C" plate for those skinny metal dies. So, the 'sandwich' layers are different when running it through the machine, but the results are the same! Remember though, the Cuttlebug can only take dies, embossing folders, etc. up to 6 inches wide. So I just watch what I purchase, so I know it will fit. You can purchase all the longer cutting/embossing plates you'll need for the longer dies (an A, B 2-pc set, and C plates). That's what I did! :)

Wednesday, October 24, 2012

Wedding Card

For my son's wedding, I made him and his new bride a card, of course!
I got the idea from a pin on Pinterest, and I think it turned out well.
Michelle's favorite color is pink, and her wedding colors were pink, yellow
and purple, so I made the card in those colors. I'm just glad they liked it!
But the photos came out a bit blurry... sorry :(


the front
(remember to click on any image to see it bigger)

The ribbon is actually keeping the card closed. I didn't want them to have
to untie and re-tie the bow, so it's a permanent bow with a magnet closure
underneath. It needed something to keep it closed, since it turned out so thick! See what I mean...


I even had to make a custom box for it....


This is the card open and standing (close-up photos are farther down):


and this is the back, both open and closed:


Here are some close-up shots of the front and back of the card:


As usual, I used a bunch of I Am Roses. All the colored
ones are painted with Lindy's Stamp Gang's Magical Mica's!
The white ones are the original colors as they came. 

Now these photos are from the inside of card.... first and second 'page'...


page 1 closeup

page 2 closeup


And then 'pages' 3 and 4....


page 3 closeup

page 4 closeup - (we tucked a check in the pocket behind the tag)

and the closeup of the tag:

I did the embedded-embossed technique on this tag, as well as
the hearts on page 1 and the hearts here on the back:


a closeup of hearts on the center back

Well, that's a lot of photos, and all of them were probably not necessary for this post, but I never know when to stop until I've run out of photos, LOL!! 

Thanks for stopping by.... have a great day! :)


Friday, July 27, 2012

Last Floral Impressions Twisted-Easel Anniversary Card

Well... here is the last of this year's anniversary easel cards! Another "twisted" one! I'm finally done with the Floral Impressions paper pack... yeah!


I don't have anymore anniversary cards to do for this year
(my fiscal Oct-Sept!)

Now I can concentrate on making 2 wedding cards... one I need for next Wednesday... yikes!... and the other for our son's wedding on Sept 8th! Better get myself in gear, and get a move on! My hospital stay put me behind a bit!

Then it will be back to anniversary cards in October with a "new" paper pack and card design... wonder what I'll decide to do? But I'll have to put those decisions off until after the wedding!

Just a side note... with all this wedding stuff going on, and my recuperation, and our first grandchild due in three weeks, and life in general, etc, etc....
I probably won't be able to do many blog posts, if any at all... but I'll do my best to get back asap to my 10 "posts" per month schedule I had decided
to do!

Wednesday, July 25, 2012

Sympathy Card

Some sad news for today...

My sister's best friend, Kathy, lost her battle with cancer on July 13th.
They were friends for 40 years!

I actually introduced them back in 1972! We were teenagers then, and had just moved to Dallas at the time. There were lots of kids living in the apartments we moved into, and I had met Kathy's younger sister first. Anyway.... I was in the hospital when she died, so I have just now finished the sympathy card for my dear sister.


I have been making anniversary cards with the retired CTMH paper set
Floral Impressions, and it seemed perfect for the sympathy card as well, since Kathy's favorite color was purple. I also decided to make it a
twisted-easel card. I hope my sister likes it, even though it's very late.
She was up at the hospital with me every day, despite her personal grief.... so I know she'll understand why it's late.


It's just so sad to lose a loved one.
Thanks for letting me share this with you all.


Tuesday, July 17, 2012

Card Ideas using a "Starter" Spellbinders Set

There are so many beautiful Spellbinder dies to choose from, that it's sometimes hard to know where to start!  So making an informed decision before you shop, and spend all your hard earned cash, would be quite helpful and possibly money-saving!

In this video, Christina from Card Making Magic, shows a really good starter set that will cover most of the things you want to do, from textured backgrounds to beautiful flowers. Then she demonstrates some different ways in which to use the dies to make some lovely cards. Such inspiration!..... see for yourself:

Watch on YouTube: HERE


Wasn't that great? I just love all of her ideas. She is so creative and thinks of things that NEVER cross my 'logical' mind...... I wish I had a "creative" one, LOL :)


*** UPDATE ---- See the sequel video to this - "Get More From Your Spellbinders," - coming to this blog, being posted on Novenber 5, 2012 ***


Sunday, June 24, 2012

More Anniversary Easel Cards

Here's a few more of my Floral Impressions Anniversary Easel and
Twisted-Easel Cards that I'm making this year:

Grey Flannel base with the old Level 1 Kit matted on mirricard


Mirricard mats on Amethyst base


Level 1 Kit matted on Amethyst then put on Grey Flannel base

Mirricard mats on Olive base and ribbon inked in Gypsy


Floral Impressions is a retired CTMH paper pack, that coordinates with the CTMH colors of Amethyst, Olive, and Gray Flannel cardstock. Shiny mirricard is also used as mats on most of the cards. I used Magical Micas from Lindy's Stamp Gang to paint the flowers as always!

For more info on these, please see my other easel card posts both here
and here.


Wednesday, May 30, 2012

Anniversary Twisted-Easel Cards

Well, a little over a week ago, I promised to post some of my
Twisted-Easel Anniversary Cards. (To see the post with the regular easel anniversary cards, click here.)

Since we're still in my fiscal year according to anniversary cards
(Oct2011-Sept2012), lol, these cards are still 6x6 and done in
CTMH paper Floral Impressions (retired).


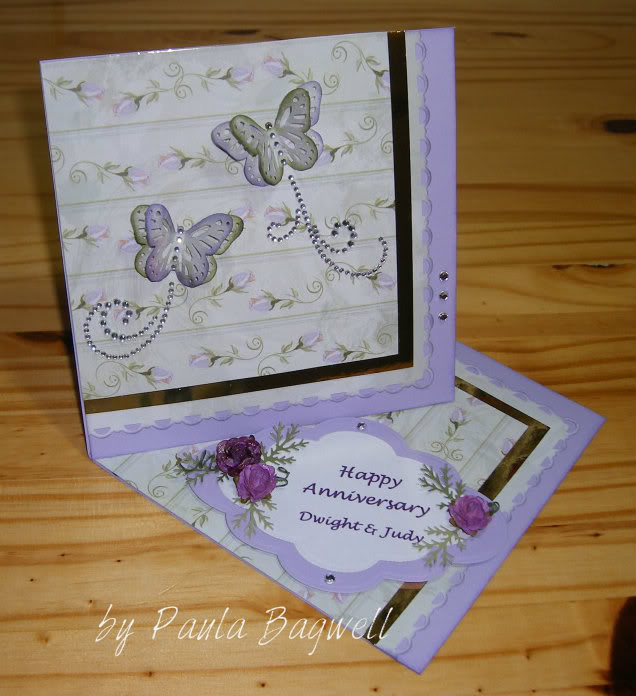
Amethyst base with GOLD mirricard, double-layer butterflies
inked in Gypsy on Olve and reversed to Olive on Gypsy

Olive base with GOLD mirricard and the same butterflies,
a different patterened paper from same set

This one is 'twisted' in the opposite direction.
This is the closeup of the top portion
and this is the closeup of the sentiment --- you can see the shadow
from the loops of the paper lace down on the sentiment...
the flash caused the mirricard to shine down, but not through the paper!
(all flowers are from I Am Roses and painted with
and the final card for today!

So that's it for now.... as you can see I made 3 of the 4 very similiar, with just a few differences like the placement of the bling, etc.

Sunday, May 20, 2012

Anniversary Easel Cards

If you don't know it already, I'm a little OCD! I can't seem to change the type of anniversary cards that I make except on a yearly basis! And "my" year doesn't start in January either! It starts in October.

Why, you ask? Because that is when my BFF's anniversary is (and my sister's was, as well, but not anymore), so I start with them! So then everybody else I know, gets a card with something of the same theme...
like last year - Oct2010 to Sept2011 - everybody got cards made with the CTMH Miracle paper (retired), but I didn't take any photos of them. :(

This year (Oct2011 thru this coming Sept) I started by making both of them Double-Twisted Easel Cards. If you'd like to see those cards, check them out here and here.  

So this year, everybody is getting an easel card whether it's a regular easel, a twisted-easel, or a double easel. And all, except those first 2 double-easel cards, will be 6x6 and done with CTMH Floral Impressions paper (retired)! I've posted a few of them below:

grey flannel base and olive mat with double amethyst layered butterflies

olive base with gold mirricard mats and double-layered butterflies

This next one has the same olive and gold,
and the butterflies are still 2 layers but inked with olive
on gypsy and the other as gypsy on olive!


These 3 are the same - olive base with gold mirricard with
the opposite inked 2 layer butterflies. The center
card just has a different greeting shape and configuration.

I also decided to do a wedding card as 5x7 easel:
This one has amethyst as the base and silver mirricard mats.


This final one here is done on an amethyst base as well,
but has purple mirricard mats!


I'm loving this Mirricard! If you click on the photos to see them bigger, you can see how really "mirror-like" it is by the reflections you can see.
It is so pretty!

The flowers are painted with Lindy's Stamp Gang Magical Micas, just like the posts of the double-twisted easel cards I mentioned above.

I'll post some 6x6 twisted-easels soon, so come back and check them out!
Thanks for stopping by today! I'm glad you came :)


Friday, April 27, 2012

Baby Stroller Card

This card is just too cute! :)  It's a standing baby buggy carriage.... Adorable!
I made this for my daughter's surprise baby shower we had this past Saturday, while she was home for a visit.

I used this retired CTMH paper pack called More-to-Adore. Since the bumper pad for the crib is Pink Paisley Splash, I wanted to match the paisley theme, and this paper set was perfect! The card actually matches 3 nesting "hat" boxes I made for her. I will show you those in the next few days!

view laying flat

view standing up!

I got this card idea from Rhea, aka the night owl stamper. She shows how to make these in her 'take 2' attempt of her first video tutorial:   


Watch on YouTube: HERE


Aren't they precious? Hope you enjoyed it!

Supplies:
CTMH: More to Adore paper pack (retired), Cotton Candy Cardstock, Bitty Sparkles
Martha Stewart Lace Border Punch
Nestabilities Scalloped Circle Die
Adhesive: Dotto and Glue Dots
glitter flower brads (for spokes) and bow were old stash on hand


Sunday, October 23, 2011

Double-Twisted Easel Card 2!

Well here is the second Double-Twisted Easel Card I've made this month for an Anniversary! (Actually this is only the second one I've ever made... see the first one here) This time it's for my sister and her hubby, and I'm entering it into my very FIRST challenges ever! 

The challenges are:
Beary Sweet Scrap Challenge #36 - Double or Nothing - 2 easels
Totally Papercrafts Friday Challenges #89 - Layer upon Layer  - for multiple layers!


Green is my sister's fav color and since my bro-in-law likes the Denver Broncos, I figured he might like blue! But instead of doing a "his & hers" theme by sides like the first one, I decided to combine the colors together.

I made this the same way... still a 6" x 12"... (except for a few things which I will explain in this post).... if you're curious as to what I did, check out the first one for a more thorough explanation, as I'm not going to go into it all again in this post.

The first thing that is different, is that I did have to "build" this one on a thin piece of chipboard for the needed strength to hold the weight. I did not acheive the same sturdiness as the first with just layers of cardstock, because on this one, the shiny mats around the base and easel panels are just very thin paper instead of heavy cardstock!

Next photos are the close-ups of each side:

left side

right side


Now the center sentiment all decorated with painted mulberry flowers (they were originally white) from I Am Roses:

Click on photo to view LARGER and see all the "sparkling" roses!

For these roses, I also used Lindy's Stamp Gang products... are you surprised at all by this? LOL! I "painted" the colors on just like before (again see the first double-twisted easel card post if curious!)

Products from LSG that I used for these roses are:
Starburst Sprays - Afternoon Delight Denim and Hydrangea Blue
Glitz Spritz  - Scintillating Silver


Here are some close-up shots of the roses and butterfly embellishments:

Lace border and Leaf punches from Martha Stewart
Rose done in Afternoon Delight Denim Starburst Spray topped with
Scintillating Silver Glitz Spritz from LSG


I had to 'color' the flower that is part of the sticker to match since it was pink!
I used CTMH markers to change the colors!
Rose done in Hydrangea Blue Starburst Spray, again topped
with Scintillating Silver Glitz Spritz


Check out the "sparkle" on this darker rose... AWESOME!
Butterfly punch is also Martha Stewart.


Bling used for bodies are from the Green/Blue assortment from CTMH


List of supplies:
Basic Grey Two Scoops paper pack with stickers
Bazzill cardstock - Guacamole
Metallic Foil paper by Hygloss
CTMH cardstock - White Daisy (for lace border)
CTMH markers - Outdoor Denim and Crystal Blue
CTMH Sparkles (clear) and Sparkles Green/Blue Assortment
Scor Tape
Herma Dotto
Spellbinders Nestabilties Labels #6 Dies
Martha Stewart Punches - Lace border, Butterfly and Leaf
Lindy's Stamp Gang Starburst and Glitz Spritz Sprays (as described in post)
I Am Roses - 3 sizes of white mulberry roses
Rhinestone Flourishes (from my stash - don't remember manufacturer)
Pop-Dots for dimension of sentiment
Chipboard
MS Word computer Font


Related Posts Plugin for WordPress, Blogger...