Showing posts with label Cards: WEDDING. Show all posts

Friday, October 17, 2014

Wedding Card

I made a wedding card for my DD and SIL.... it may seem like déjà vu 
because of this recent post - (click here). I made it the same, except I did a color change:


(click on photo to view larger image)

This card is the same size as the other one - 8.5" x 5.5" (a full 8-1/2 x 11 sheet just folded in half). I had to make my own envelope for this one, which took an entire 12 x 12 sheet of Colonial White cardstock!

I used one of my favorite photos of the couple while they were dating... (even though she hadn't gone 'blonde' yet at that time!)... and printed it out in Sepia. 

I used CTMH cardstock in Colonial White and Outdoor Denim. along with Outdoor Denim ink. The embossed panel is slightly raised with dimensional tape. Using a sponge, I distressed the edges and the raised embossed area with the matching ink. 

The lace-edged burlap is from a shop on Etsy. I just absolutely love it! 
I also used a wider version of it on the Guest Book album. (You can see the album here, in case you missed it).... The metal heart I've had for so long, I don't remember where I got it! It's attached using a hot glue gun.

Finishing touches are the little punched hearts, embossed & inked, and 21 pearls from CTMH (Mocha Opaques)!

Thanks for stopping by today. :)
Have a great day!


Saturday, August 17, 2013

Zebra Wedding Card

My only nephew is getting married next month. My sister had a bridal shower for the happy couple here in my home last month. Here is the Bridal Shower/ Wedding card I made for them.


I embossed the red cardstock with a zebra print Cuttlebug embossing folder before cutting into the banner strips. Then I outlined the indented lines with a silver glitter gel pen to make them stand out a little more. I added a black velvet glittered ribbon and red velvet hearts to the front. 

I forgot to take a photo of the matching inside, but it had one red zebra patterned strip laying horizontally toward the bottom with the velvet ribbon going down the middle of it, stopping just short enough for a red velvet heart to fit at the end of it, but still on the red banner piece. If you look closely at the left side inside corner, you can see a bit of it in the photo. Next time I'll try to remember to get that "inside" photo!

Thanks for stopping by my blog... I hope you'll come again :) 


Wednesday, October 24, 2012

Wedding Card

For my son's wedding, I made him and his new bride a card, of course!
I got the idea from a pin on Pinterest, and I think it turned out well.
Michelle's favorite color is pink, and her wedding colors were pink, yellow
and purple, so I made the card in those colors. I'm just glad they liked it!
But the photos came out a bit blurry... sorry :(


the front
(remember to click on any image to see it bigger)

The ribbon is actually keeping the card closed. I didn't want them to have
to untie and re-tie the bow, so it's a permanent bow with a magnet closure
underneath. It needed something to keep it closed, since it turned out so thick! See what I mean...


I even had to make a custom box for it....


This is the card open and standing (close-up photos are farther down):


and this is the back, both open and closed:


Here are some close-up shots of the front and back of the card:


As usual, I used a bunch of I Am Roses. All the colored
ones are painted with Lindy's Stamp Gang's Magical Mica's!
The white ones are the original colors as they came. 

Now these photos are from the inside of card.... first and second 'page'...


page 1 closeup

page 2 closeup


And then 'pages' 3 and 4....


page 3 closeup

page 4 closeup - (we tucked a check in the pocket behind the tag)

and the closeup of the tag:

I did the embedded-embossed technique on this tag, as well as
the hearts on page 1 and the hearts here on the back:


a closeup of hearts on the center back

Well, that's a lot of photos, and all of them were probably not necessary for this post, but I never know when to stop until I've run out of photos, LOL!! 

Thanks for stopping by.... have a great day! :)


Monday, September 5, 2011

Tutorial - a Square-Triangle Tri-Fold Card.... (an oxymoron??)

A square-triangle? "Isn't that an oxymoron?" you ask.
NO!.... not when we're talking about the Square-Triangle Tri-Fold card!
I even put a diamond on top...


This is my first tutorial, so I hope you like it. It's really pretty easy
to do. (You can click on each photo to enlarge it.)

For this particular card, I'm using the retired paper pack - Floral
Impressions - and cardstock in Amethyst, Olive, Grey Flannel and
White Daisy.

Now, on with the tutorial....

The Card Base:
The finished card must be a perfect square. For this tutorial, we'll be
making a 6x6 card. The card base needs to be three (3) times as
long as it is high, so we'll need to start with a piece of cardstock that
is 6" x 18"...

To achieve this, an entire 12x12 piece of cardstock is needed for the
base. Take cardstock and cut it in half, then score each half at the
6" mark..... like this:


Using a very strong adhesive (I used Provo Craft's Terrifically Tacky
Tape), glue one 6x6 section of one of the pieces to a 6x6 section of
the other piece, to end up with this:


Now score both outside sections diagonally in the same direction:
(I used my cutter and the embossing stylus to score)

(I just bent these scored marks to be able to see them better)


Now fold the scored 'triangles' like this:

(Oops! The card base in this photo is upside-down ---
I had just turned it over to use the bone folder
to crisp the folds.... sorry... turn it back over to continue!)

Then fold each side in, like this:


Use bone folder to crisp folds. The finished card base will look like this:


Make Your Focals:
The base of your 2 focals need to be exactly the same. You can make
them anything you like. I used my Cuttlebug and diamond-shaped
Nestabilities to create mine.

(you can see my focal bases 2 photos down!)


Time to put card together: 
Now cut 2 squares out of chosen patterned paper - one 5-1/2" x 5-1/2"
and one 5-5/8" x 5-5/8". (I cut my 5-1/2" square from the matching
Level 1 Kit I had - also retired, and the 5-5/8" square from the B&T
paper that matched from the Level 2 PP.)

Then cut the 5-5/8" square piece diagonally to form 2 triangles. Ink
all the edges of papers and card base if desired. Adhere to the triangle
sections of the card base. Next, adhere the 5-1/2" square in the
center of card base, as shown:

(see my focals now?... just not decorated yet!)

Now it's time to finish decorating the 2 focals, so we can add them to
the card! My sentiments are just printed in Word on my computer,
and popped-up with very thin (1/16th" thick) double-sided pop-up
foam dots for a little extra dimension. I edged the top diamond with
Lavender Flower Soft!

For the card to open and focals to be in the right direction, it's much
easier to close the right side of card first. Add middle focal by one
edge unto the folded triangle, leaving the bottom left side of focal
loose, like so:


(This is what it looks like open, after attaching the focal... see how the
focal is sideways? Very easy to get it glued down in the wrong
direction, if you don't close the side in first!)

Now close the left triangle over top of the middle focal. Attach front
focal piece. Only glue bottom left edge unto the triangle and make
sure that it's completely lined up over that middle focal, like this:


Now open it all up, and finish the center square.

I used Word again for my inside sentiment (not shown here), and
printed it out on cardstock. I cut it smaller, leaving enough space
on it for our signatures, and attached it on the
center square in the middle. Signed it, and...
Viola! All done!


Thursday, August 18, 2011

The Wedding Cake for Susi

I am finally done with the Wedding Cake Gift Card Box I made for my friend, Susi!
As you all probably know, this 'cake' was inspired by Tracey Mason's fabulous one with those rolled roses she is so good at making!

Well, try as I might, I could NOT make those roses. My hands cramped after trying just
3 times, and they still didn't even resemble anything close to a rose, lol!..... So, I had to come up with another plan. One that I could do!

I was inspired again... this time by 3 ladies - two CTMH consultants:
1) Connie MacFarlane (see post "Easy Paper Flowers" under 'Flowers' on this page)
2) Mandy Leahy (see post "Carnations" under the 'Flowers' on the same page)

and by Lorinda from Atwater Moon (see post "Itty Bitty Paper Flowers", also under
the 'Flowers' here ).


Now without further a do.... I give you Susi's Wedding Cake! ---- just click on each photo to see it larger!


(Update 10.27.13 - With a new post today, on my latest Wedding Cake Box, I had to revisit this post.... it just occurred to me that I took the photo above before I added the pearls to the top and bottom layers, LOL!)

I made this using Tracey's instructions: 3 nesting paper mache boxes, covered in Colonial White cardstock. The middle layer is embossed using a Sizzix embossing folder in my Cuttlebug! Then several coats of Pearl Paint. The red paper "ribbons" at the bottom of each layer, were added after painting (and before hot-glueing the layers upside-down on top of each other!), as the pearl paint turned the red to pink!

The red flowers and the yellow-orange flowers are not made with CTMH cardstock, because I did not want the white-cored paper for those flowers. So those cardstocks were just from my stash. The colonial white flowers, both carnations and itty bitty's, are inked on the edges in Cranberry - 4 times to get the edges dark enough!

Here are the side and back views:

the left side


right side and back


The next photo is a close-up of the top of the 'cake'. The top carnation is just pinned on with a floral pin and the gift card is down inside a pocket I created and put inside the center of the cake. I cut a slightly wide slit in the top and second layer of the cake to accommodate the gift card pocket. The ribbons under the flower are attached to the gift card. I punched a hole in it (missing the magnetic strip) to put the tie through. After removing the gift card, the flower can be re-attached by just replacing the floral  pin to complete the cake again!


I made the carnations (inspired by Mandy) in 3 different sizes. The large are made exactly as in her tutorial, with 8 layers of the 2" scalloped circle punch. The medium size are done with 7 layers, and just not "fluffed out" as much as the larger one.

For the smallest carnation I actually used part of a Martha Stewart All Over the Page Punch, but it's the equivalent of a 1-1/4" scalloped circle punch. They are made with just 6 layers!

I did try inking the edges first, before spraying with water, which made the ink gradiently bleed toward the center of the petals (cool look!), BUT doing that made the Cranberry ink turn to Sorbet!....  NO KIDDING!! So I had to wait for the flowers to completely dry before inking them!


The yellow-orange flowers (inspired by Connie) are actually a cardstock version of hers! These flowers needed the Liquid Glass to hold together!

I did not have any 12-petalled flowers to fold and use, so I punched out ten 6-petal daisies (yes, 10 for each flower!) - glued 2 together as a base, off-setting the petals, so they ended up with 12 petals! Then folded the other 8 layers like Connie does in her tutorial, put a puddle of Liquid Glass in the center of my base, and glued 7 of them down by putting the folded end toward the center. The eighth folded petal, I glued straight up in the middle!.... Had to hold these puppies together for a minute or two for the glue to set a bit before moving them to the side to dry overnight! Once dry, I separated the petals a little bit to get a fuller look.


The other small red and Cranberry-tipped Colonial White flowers, are the "itty bitty's" inspired by Lorinda, and made exactly like she says in her tutorial!

Here's a closer look at the cascade of flowers. I hope you can see more details in this one:


The leaves were all cut from Olive cardstock, dry embossed lines on the underside for 'veins', then lightly inked the edges and over the top to show the 'veins', with Olive ink.

I covered the hot-glue seam between layers with glitter to help hide the glue.
And the final touch was the Pearl Opaques to adorn the top and bottom layers!
Viola!.... my masterpiece!


I hope you really like this creation I made.... while many were the "trials and errors"
in this endeavor, since it was my first attempt, I feel that it came out beautifully in the
end, and I know Susi will love it!

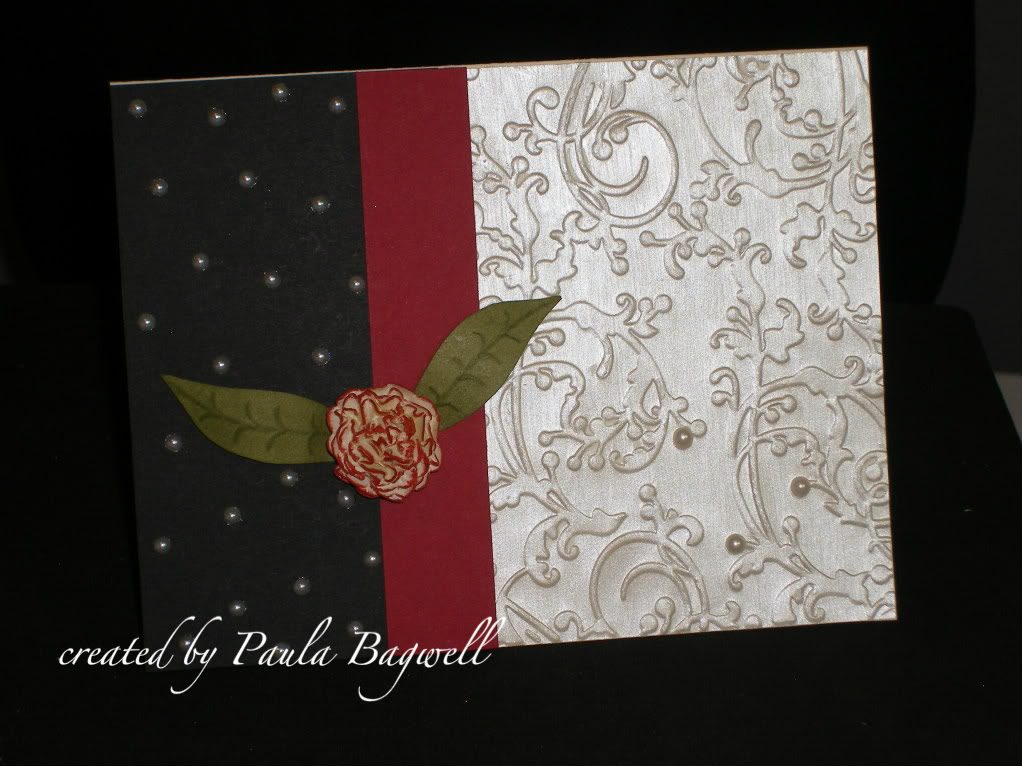
One last photo - the matching Wedding Card:


So, now that I'm done (and done early by 2 days from my given deadline!), Carol owes me the full 100 gloriously scrumpious peanut butter balls!!!... Get to rolling them Carol!

Hugs!


Related Posts Plugin for WordPress, Blogger...