Sunday, May 15, 2016

My Favorite Bokeh


(click on photos to view larger images)

I'm not sure if it's the colors I used on this card, or if it's because the bokeh technique turned out better (I get more practice each time) or if it's a little of both.... but this turned out to be my fave bokeh anniversary card so far! This one was for our DD and her hubby's first anniversary. 


I used my favorite sprays... Lindy's Stamp Gang's Starbursts... for the background. I just love their shimmery goodness! I added water to move the colors around and blend a bit. After letting it dry overnight, I added the bokeh "bubbles" using homemade circle punched templates in different sizes (and a finger dauber for the smallest dots) with CTMH white daisy pigment ink. The panel was just a bit too large for the front of the card, so I used it's trimmings on the inside with the sentiment.


The ribbons are from CTMH and retired.... I layered them, added the bow and called it done! I was thrilled that she loved the card :)


Monday, May 9, 2016

My BFF's Recycled Cards

Even though my BFF and I live in the same city, she sends me a few cards every year. I keep cards people send me for a very short time if they are store bought ones. I'll display them on the mantle for a week or two, then usually out they go!..... BUT...

(click on photos to view larger images)

If they are handmade - like the ones my BFF sends - then I keep and display them for a much longer period of time.... sometimes years!

When I run out of room, I have to make a decision about what to do with them. They are so special to me, that I can't bear to just throw them away, so I've decided to recycle them!

So I cut off the pretty decorated fronts and attach those to new card bases for a whole "new" card!! These are a few examples.

I just adore the one above using tone-on-tone Crumb Cake card stock and ink from Stampin' Up! Such a pretty flower stamp from that company as well, although I don't know what it's called. And the tiny butterflies with their bling bodies just completes the whole thing.


The one above was made from a card kit, with stickers and diecuts, that CTMH had years ago. I love the copper brads she added, and decided I could use it for a masculine card... nothing easier than that!


This last one she made me was a simple thank you card for an anniversary gift I gave her that included all the washi tapes she used on the card!

Since I'm so sentimental about her cards, now the test will be if I can actually mail them off to someone else, LOL!... Only time will tell....

Thanks for stopping by. Please come again :)


Tuesday, May 3, 2016

Recycled Cards


(click on photos to view larger images)

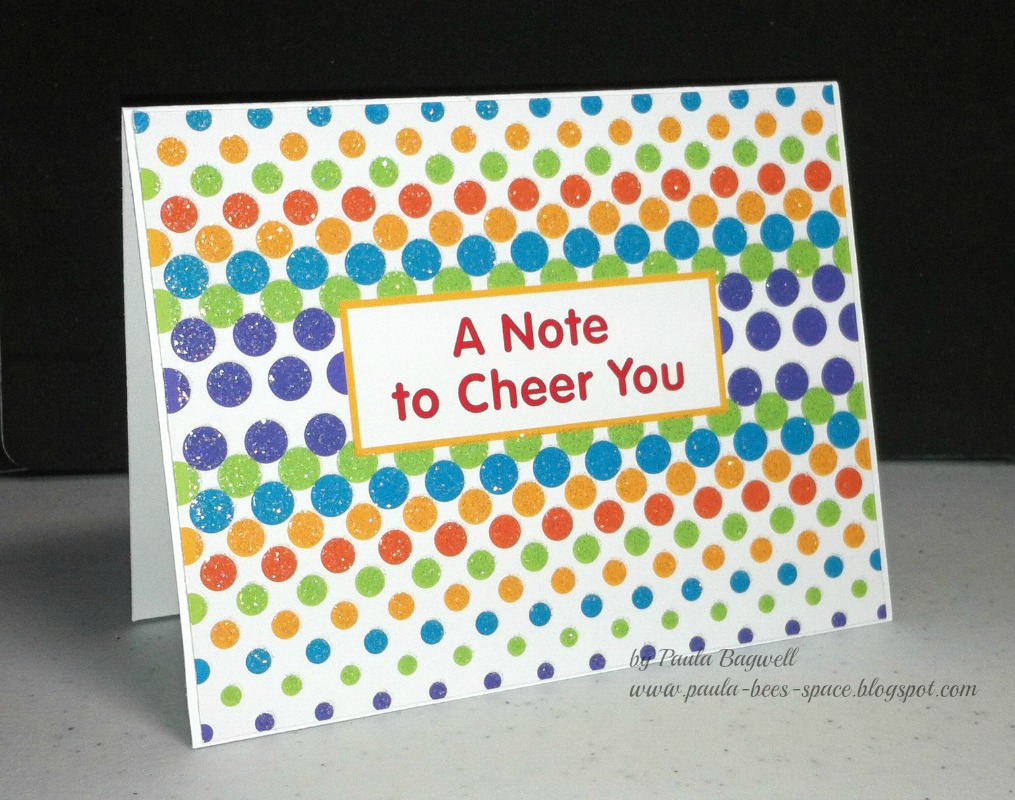
These sparkly dotted card fronts used to be ONE big card. It was a card given to me by a friend and since I only keep store-bought cards displayed for a very short period of time, I decided it was just too cheery to throw away.... so I recycled!! (Yay... less in the land-fill!)

I cut off the card front and then just cut it in half and attached each piece to another card base. Of course, by doing that, the original sentiment on the front ended up on just one card, so I stamped the "pssst..." on a matching scrap, punched it out and popped it up with dimensional pop dots on the other card.


Then I stamped the sentiment on the same color scrap, punched it out and attached it to the inside. Both are from the Stampin' Up Happy Watercolors set.... Easy-peasy!!

Now on this next one, I did absolutely nothing on the front except glue it to the new card base... can't get any simpler than that, LOL!


The inside of this one couldn't be simpler either, because it's from the original card as well.... I just cut out the sentiment and attached it inside the new card!


So now I have 2 "new" colorful, cheerful, encouraging cards ready to send to friends when I need them.

I hope this inspires some of you to stop and re-think before just throwing away cards you've received.... try recycling!


Wednesday, April 27, 2016

Metallic Sympathy


(click on photos to view larger images)

While it is fun making cards, it's never fun when you need a sympathy card. A dear friend of mine lost her daughter this month to a rare disease caused by an infection. I made this card for her. 


I mounted this beautiful decoupage rose on to COPPER METAL mirricard (super heavy card stock). Then I mounted the entire focal piece on a 6x6 white card base, scored with 2 lines across each corner, and stamped the sentiment. (I did stamp an inside sentiment from same stamp set, but forgot to get a photo of it.... stamp is from Stampin' Up! Thoughts & Prayers set)


Here's a couple different angles showing the decoupage layers. The outside patterned frame is popped up from the copper metal layer, while the largest rose circle is attached flat to the copper metal card stock, and built up from there.... each layer is 1/16" higher each.


I am entering this card in to the challenge at Simon Says Stamps Monday Challenge - Show Us Your Metal


Wednesday, April 20, 2016

Bokeh Anniversary


(click on photos to view larger images)

I made this anniversary bokeh card for my son and DIL. It was my second attempt with this technique. I used the same pink and orange Lindy's Stamp Gang Starburst Sprays as I did on the first card, and added the pops of a bright yellow spray. 


The photos do NOT do justice to showing the sparkly colors of these sprays. Each one has a glimmery two-tone effect. I love this brand! ..... As you can see, I'm still having some trouble with the stenciled white pigment ink "bubbles" to turn out in different depths of opaque-ness (my new word) that gives bokeh it's illusion of depth, but that didn't stop me from turning it into a card anyway! I let it dry before adding the white pigment circles and then dried again overnight before putting the card together.


This is a close-up of the chipboard heart trio I painted white with pearl paint... and pink flowers with yellow pearl centers (YES, they really are yellow!)


I had to trim the original bokeh piece down to fit on the front of the card, so I added those trimmings to the inside. Stamped my sentiment and called it done!

Thanks for stopping by to visit. Please come again :)

Supply List:
3 colors of Lindy's Stamp Gang's Starburst Sprays
CTMH White Daisy pigment ink
CTMH pearl paint
chipboard heart trio from Glitterdust Designs
yellow adhesive pearls from my stash
sentiment stamped in CTMH Cotton Candy with a wood stamp from ???


Related Posts Plugin for WordPress, Blogger...