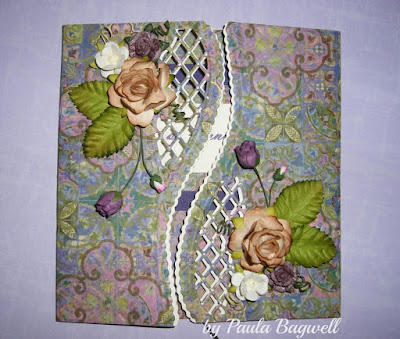
I wanted to share an anniversary card I made for my best friend and her hubby. I really do like how it turned out! It is totally a 'case' card...
I saw the original one here.
You can click on the photos to see
them larger for more detail.
front view
I ran the die through my Cuttlebug to cut both the card base and the patterned paper separately. Then I slightly offset the patterned paper to show the CTMH Colonial White cardstock below. Not only can you see the scalloped edge of the cardstock, but you can also see it behind the lattice work. I also popped the patterned paper up slightly to create more definition between the layers, and finished it off with floral arrangements and some Liquid Pearls at the lattice intersections!
open view
I made the inside very simple, but it does match! I covered the inside with the same patterned paper. For the sentiment, I layered the patterned paper on a dark purple cardstock mat, and then attached the sentiment on top to make it stand out.
Here are a couple of close-up views:
close-up of top left
close-up of bottom right
The flowers and leaves are all from I Am Roses. I hand-painted the small "open" dark purple roses (not the buds) with magical mica's from Lindy's Stamp Gang.... LOVE that stuff!!.... The roses were white before I painted them. You can see how they sparkle when looking at the full-size image
(click on photo), but the photos don't even do them justice. They are more 'sparkly' in person!
view to show the dimension of the paper layers...
see how the patterned paper is raised up slightly
above the Colonial White cardstock?
I used a bunch, and I mean a whole bunch, of tiny, 1/16" thick pop-up squares between the paper layers for just a little dimension. I didn't want to raise it up too much. You can see just the first row of them down the right flap edge in the photo above. Each front panel has them all around the edges, as well as holding up the centers of each panel. It required so many of them to stabilize the lattice area, since none could be put between the layers there without showing.
One final look... I hope you liked this card, too!
Thanks for stopping by today :)
Supplies:
Paper - Hot Off the Press
Cardstock - Bazzill and CTMH
Die - Joy Craft
Flowers/Leaves - I Am Roses
Liquid Pearls
Lindy's Stamp Gang Magical Mica's
Scor-Tape
Other: MS Word; hot glue; dimensional pop-up squares


