Sunday, October 26, 2014

Thank You Cards

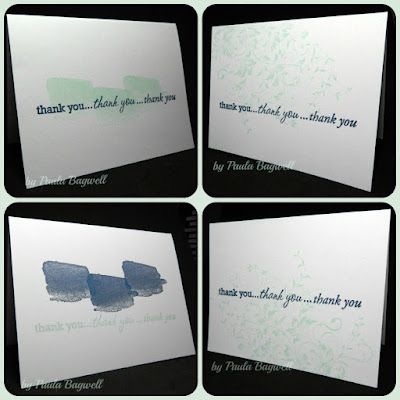
I had offered to make the wedding invitations for my daughter, but they had already decided on which invites to use. So she asked if I would make her a bunch of thank you cards.

Since my arthritic hands were still hurting from all the stamping I did on her Guest Book, I decided to make really simple, one-layer stamped cards that would not be any problem to mail... they are flat, LOL!


(click on photo to view larger images)


I made quite a variety, some vertical, some horizontal, as you can see, but she should be set with 144 of them in her wedding colors --- navy, mint and white!

Thank again for stopping in :)


Friday, October 17, 2014

Wedding Card

I made a wedding card for my DD and SIL.... it may seem like déjà vu 
because of this recent post - (click here). I made it the same, except I did a color change:


(click on photo to view larger image)

This card is the same size as the other one - 8.5" x 5.5" (a full 8-1/2 x 11 sheet just folded in half). I had to make my own envelope for this one, which took an entire 12 x 12 sheet of Colonial White cardstock!

I used one of my favorite photos of the couple while they were dating... (even though she hadn't gone 'blonde' yet at that time!)... and printed it out in Sepia. 

I used CTMH cardstock in Colonial White and Outdoor Denim. along with Outdoor Denim ink. The embossed panel is slightly raised with dimensional tape. Using a sponge, I distressed the edges and the raised embossed area with the matching ink. 

The lace-edged burlap is from a shop on Etsy. I just absolutely love it! 
I also used a wider version of it on the Guest Book album. (You can see the album here, in case you missed it).... The metal heart I've had for so long, I don't remember where I got it! It's attached using a hot glue gun.

Finishing touches are the little punched hearts, embossed & inked, and 21 pearls from CTMH (Mocha Opaques)!

Thanks for stopping by today. :)
Have a great day!


Thursday, October 9, 2014

Another Anniversary Card

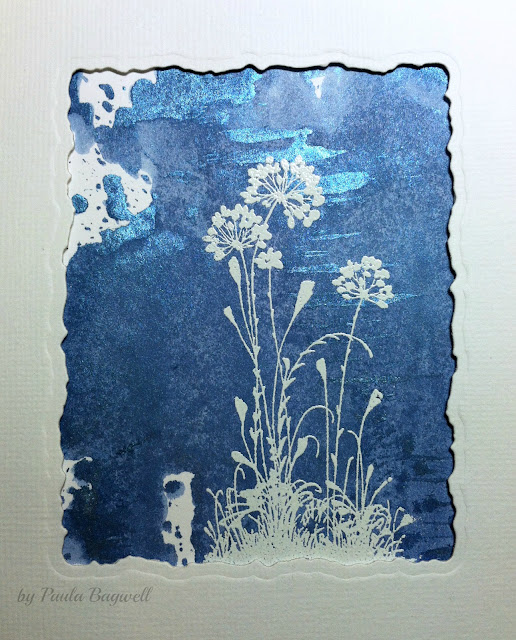
My nephew and his wife got married the day after my son's wedding, although it was a year later. I made this anniversary card for them:


This card is in CTMH White Daisy cardstock, so please forgive the photos... I got them slightly off in color, didn't I? Too many shadows, LOL, gave them a yellow tinge!

Anyway... the background of the focal area I made with Lindy's Stamp Gang's Starburst Spray, by spraying and then smearing it across the white cardstock with a scrap piece. I love these two-toned color sprays that sparkle, but you can not tell in the photo above just how sparkly the blues are. It even looks like a 3-tone color! 

Tried as I might, I could not get the camera to pick up all the sparkled areas of the card at the same time.... so frustrating! So I laid the card flat and tried that direction:


Now in this second photo, you can see SOME of the sparkle! And if you compare it to the one above, those sparkle areas are what looked like the third, really dark blue in that first photo.

Finally, I did a close-up and was rewarded with it picking up still more of the sparkle.... just not all of it... so I gave up, LOL!... I think you can get a pretty good idea from this one. All of the really dark blues in the photo are actually the bright sparkly blue you can see below at the top of the card:


Anyway.... I then stamped my silhouette image from Stampin' Up in Versamark, and heat-embossed it with fine white embossing powder.

I used Spellbinders Deckled Rectangle die to cut and emboss frame in another piece of cardstock. It's raised slightly above image with dimensional tape to give it some depth. Then the entire panel is also raised above the card base with same dimensional tape.

Thanks again for coming to look at my card. :)


Wednesday, October 1, 2014

Wedding Cards Banner

Another wedding project to share today!

My daughter is going to use a small, open, vintage suitcase to collect any cards the guests may bring. She asked me to make a banner sign to string across the inside lid, so everyone could just drop their cards down in the suitcase.

Her only request was that it had lace on it..... so this is what I made for her:


(click photo to view larger image)

I started by making my own tags from Kraft paper. They are about 6.5" long. Then I stamped my chosen image randomly filling in the area in Versamark and did some heat embossing with superfine white embossing powder. 


Then I used the sewing machine to add the lace. I next added the mint ribbon and decided on large, round brads to use to hold the tags onto the twine by wrapping the prongs around it. One problem... I didn't have any large white brads! So I used what I had -- gold ones -- and I made them white by heat embossing 4 layers of that white superfine powder to cover them. I think they turned out well, even with the bumpy texture it created on them.


I finished them off with 1) computer generated letters to spell "cards" in navy, which I ink-distressed the edges in Desert Sand, 2) a small 
hand-painted sparkling rose & leaves accent, and 3) a matching mint bow.


I sent my daughter a photo when completed (we live in different states) and I was thrilled that she loved the banner!

Thanks for dropping in again to see my work. Please come by again :)


Related Posts Plugin for WordPress, Blogger...