
When my wonderful husband, Brad, was building my shelves for my scraproom, Carol secretively snuck behind my back, and got him to give her the red paint he was using, so she could match these large 8" letters she lovingly painted and decorated for my wall. What a surprise these were! (My hubby sure can keep a secret!)

A little background info: After Brad was transferred to our new town, because of his job in 2004, we started building our new home late in that year. At that time, I was finally supposed to get my own 'space' for my scrapbooking/cardmaking area! YAY!...
We were to be leaving our eldest, Josh, in the city we moved from, and our daughter, Jennifer, was half way across the nation from us, in her senior year at college in Virginia, swearing that she'd "NEVER" move back home! So.... I designed our home according to those plans, but.... as you can probably guess, it did NOT quite work out that way!
By the time the house was finished at the end of April 2005, Jen was planning on returning home after her May graduation (for a little while anyway!) She had accepted a job here in town during her Spring Break holiday in March, and they were holding the job open for her!
There went my ROOM! I didn't even get it for short time, because 3 days after we closed on the house, we had to leave for Virginia for her graduation! Oh well :( ... the time would come! Short-sightedly, I went ahead and put carpet in the room, which we have not changed yet, but eventually we will.
OK... maybe this is more like a "lot of background info"! But bear with me, I'm almost done!.....
Since we also now had a finished and carpeted basement, I was seriously contemplating moving my currently non-existent 'area' down there.... being held back by the fact that because of surgery, I didn't do stairs very well, and the bathroom was upstairs from there!.... So I started 'practicing' going up and down the stairs 2-3 times per day. Just about had myself convinced that I could do it, when our son decidied that he didn't like staying where he was anymore, and wanted to come back home, too! Now the basement idea was smashed as well! LOL! He took it over in September 2005! Now both the kids were home again! Not what I had planned at all! LOL! :)
Well finally, Jen found an apartment and moved out in May 2007. I could now have my long-awaited scraproom! My hubby got started building as soon as I had the plans drawn up of how I wanted the room laid out! (side-point... Josh moved out again in Dec '07, too!)
So, thanks for bearing with me!!... the photos of my 'space' are below:
I took a bunch... and I do mean a bunch... of photos, going around the room starting on the left side, behind the door! My space is an 11 x 15 foot bedroom with closet... nice and large! I've basically done it in red, black, and white, with a plethora of other colors thrown in, too! As always, you should be able to click each photo for a larger view.
First - a view from the door....
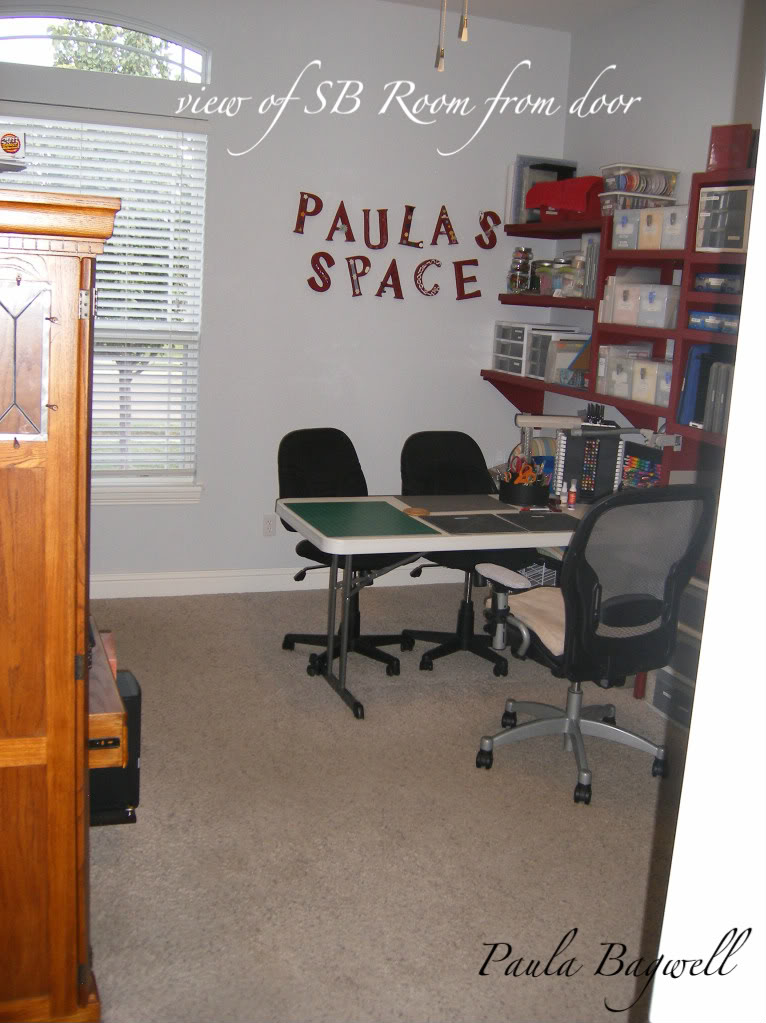
From the door, you can see those large letters Carol made on the wall. Every time I go in, they are such a delightful reminder that I have such a sweet and generous friend, and they welcome me into my "space"!
You might be wondering why they don't look 'centered' on the wall..... because they're not... at least not anymore! They were originally, when my room was ready for "move in" back in the summer of 2007! But since then, I've acquired quite a bit more stuff, since that was 2 years prior to me finding out about CTMH in 2009! So my hubby has had to build me some more shelves in that corner, which then made my 'sign' off-centered! It drives me a little crazy - just a little bit :) - but since I don't want to have to ask my DH to re-paint that wall, I live with it as is.... maybe one day I'll have him move them!

Behind the door, is my storage area for my larger punches. The top 4 bars are from Ikea. My daughter sent them to me, since I'm not anywhere near an Ikea store and these are not available online. They are the Bygel racks, each a 20" long bar and were only $1.99 each! The bottom 2 are just regular 24" towels racks from Walmart. My Xtra-Giga Marvy Uchida punches, as well as some other extra large brands, would not fit on the Ikea rails... they were too wide in depth, so the rails weren't out from the wall far enough to accommodate them. I keep my smaller punches and those that can't sit on a rail, in one of my drawers you'll see later on.
Next up, is my computer armoire and printer stand/storage.... above it hangs a very old painted window frame, from an old house in Virginia, that is only half visible in the photo (my walls are 10 feet high!)

In between the printer and the closet, is a storage center of drawers with a rolling paper cart underneath and a magnetic bulletin board above. This was one of the later items my DH made... a table-topped shelf sturdy enough to hold the side-by-side drawers I had to add. (notice... "had to"! lol!) And the top had to be tall enough off the floor to accommodate easy access to my 4th paper rolling cart I had to add as well. (You'll see the other 3 soon!)
The drawers hold everything from chipboard, slide mounts and alphabet sets to grungeboard, vacation and Basic Grey embellishments! Photos of the kids when they were 3 and 5 are in frames on top.

The paper rolling cart, below the drawers, hold my pre-CTMH paper sets from other companies like Paper Loft, Basic Grey, etc.
Next is my closet... nothing special since it's a normal bedroom closet, but it does have some shelves that hold stuff like all my extra CTMH Cardstock Paper Packs I stocked up on! Containers (yes, plural!) of extra adhesives... I keep a lot of that on hand at all times. Also has my albums that are in process, all of my packages of card bases and envelopes, and a slew of other miscellaneous items. The closet also houses my
Crop-n-Style XXL rolling carrier tote for crops!
My favorite feature of the closet is the hanging beaded curtain where the door should be!

I had my hubby remove the closet door so I could hang these up! They are black teardrop beads, formed in a cascading pattern. So retro! I love them! From the '70's, which is when I was a teenager and I so badly wanted them back then, but Mom said no, because they were for hippy's, you know... 'flower children'! LOL!.... Well I'm now rebelling! :)
This is a view of my desk:

It's only clean because I moved stuff off of it for the photo shoot!
Next is how I arrange the workspace for myself and 2 guests:

When the black chair is at the end of the table like this, there is still enough room to walk between it and the double-drawer stack/rolling cart against the wall behind it.
This next pic is a close-up of where I sit, with my Ott-Lite above me and everything within easy reach:

My tool caddy is from Pampered Chef. You can see the CTMH ink pad and marker tower in the middle. On the right is another of my hubby's creations.... I bought 3 extra marker towers and he built a box around them (laying horizontally). I store all my pre-CTMH markers in this, as well as Slick Writers, Millenium Pens, and all my Sakura Gelly Roll sets!... very handy!
Of course this is the front of the tower: and this is the back!


I have a 1/4 of a sponge for each of the 60 CTMH colors! I used a SU label punch and the cardstock swatches, punched out each color where the name was printed on it and attached with staples as my fingerhold for each sponge. Then I used velcro adhesive-backed dots to cover the staple ends and attach them to the caddy, making sure I put the soft-sided piece of velcro on the sponge tab... no need to have my fingers hurt after using them! The opposite side of those little velcro pieces are very rough!
Continued in Part 2 .... I promise, it's not as long, and shows most of the storage areas!

2 comments:
Just a suggestion for your red letters. How about removing them from the wall, mounting them on piece of plywood/foam core/something?, maybe framed and rehanging over the same spot? No repainting of the wall required for now. Just don't look underneath!
Ooo Jan... that's a GREAT idea! I'll have to think about what might be the easiest to do, since I'll need DH help, and I don't want to hear hiim groan.... I told him after he put up my last shelves, that I was done! LOL!... how could I possibly think that?!!
Thanks for the idea!
Post a Comment